This section allows you to view all posts made by this member. Note that you can only see posts made in areas you currently have access to.
#102
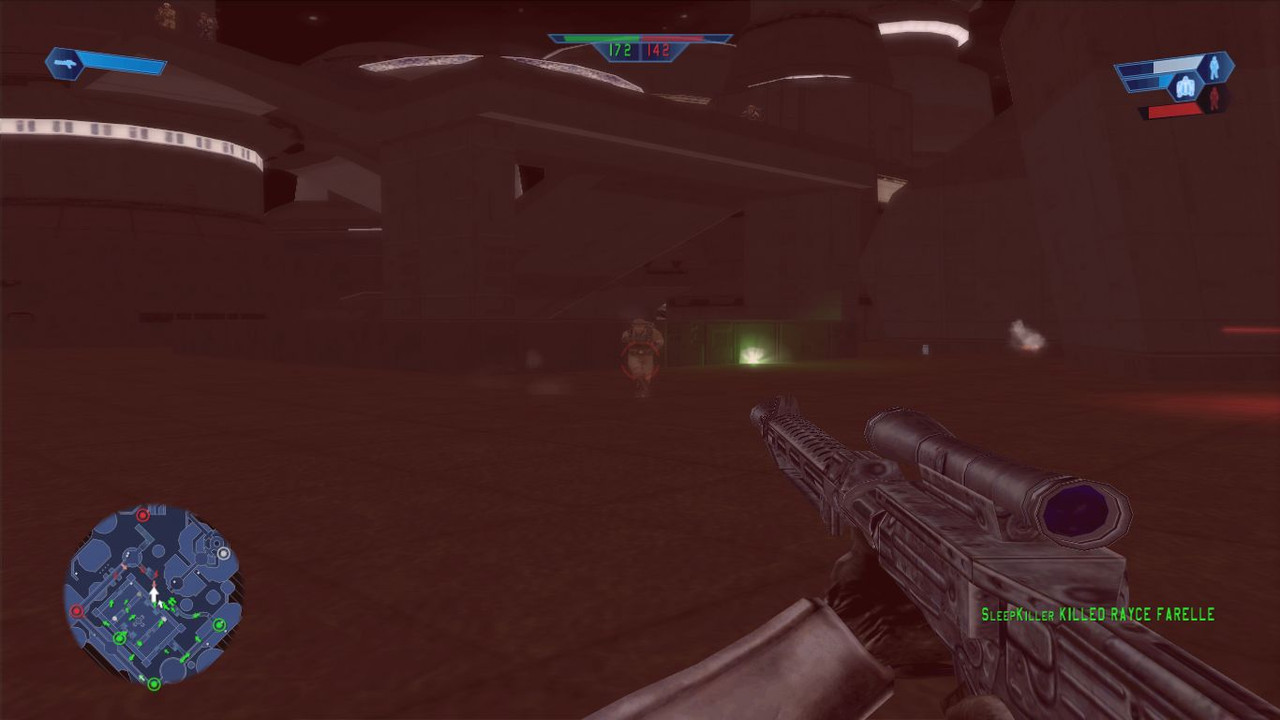
Released Maps and Mods / Enhanced Effects Mod
March 13, 2012, 06:07:17 PM
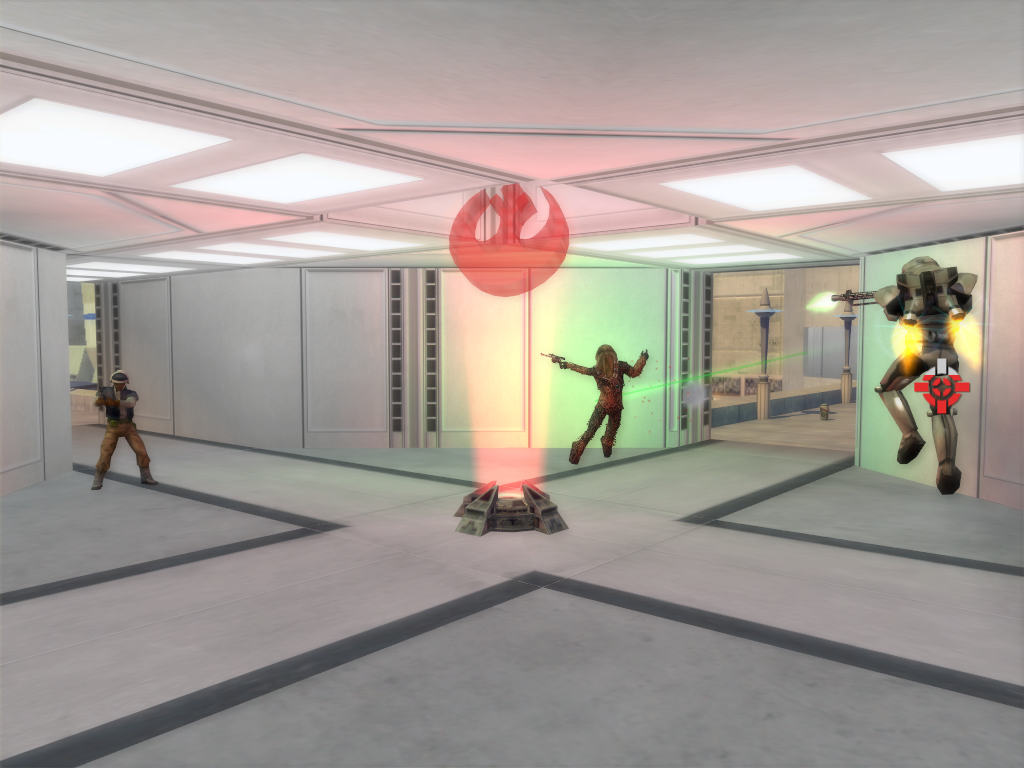
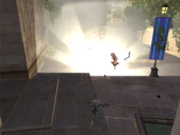
Enhanced Effects Mod
http://www.swbfgamers.com/index.php?action=downloads;sa=view;down=481
This mod increases SWBF1s effects quality on what I would call a very high scale.
100% Online compatible.
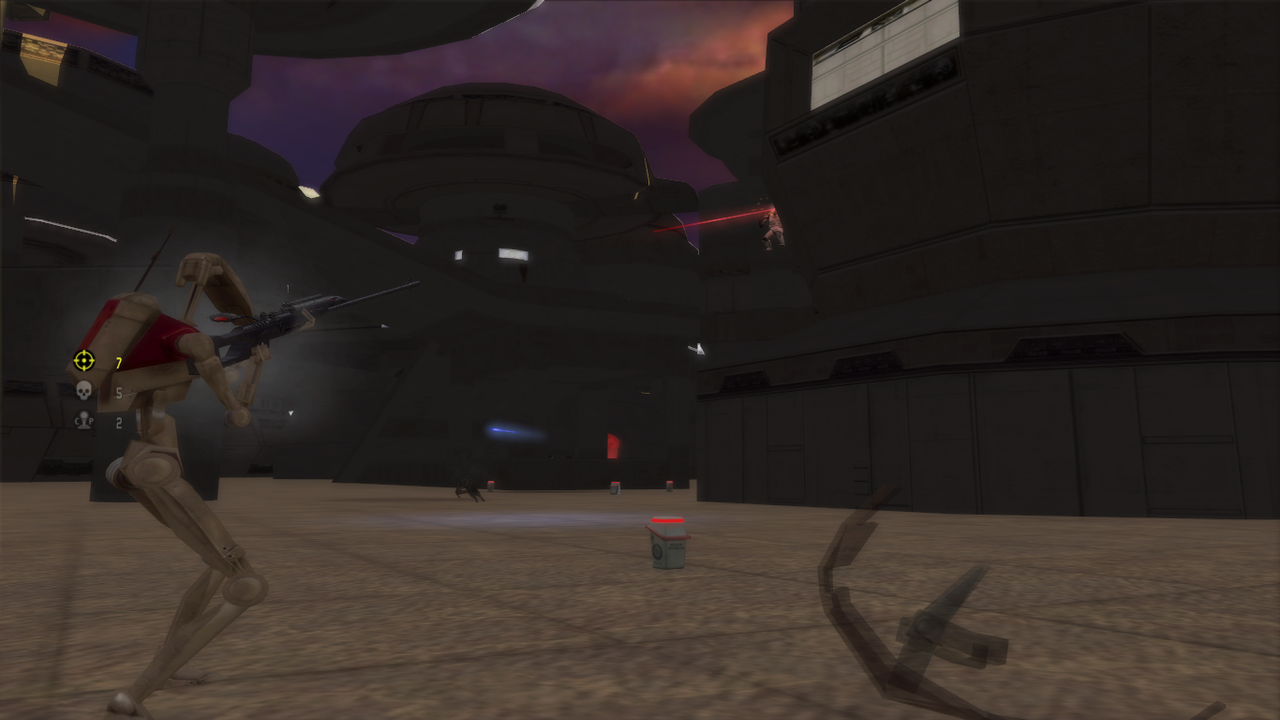
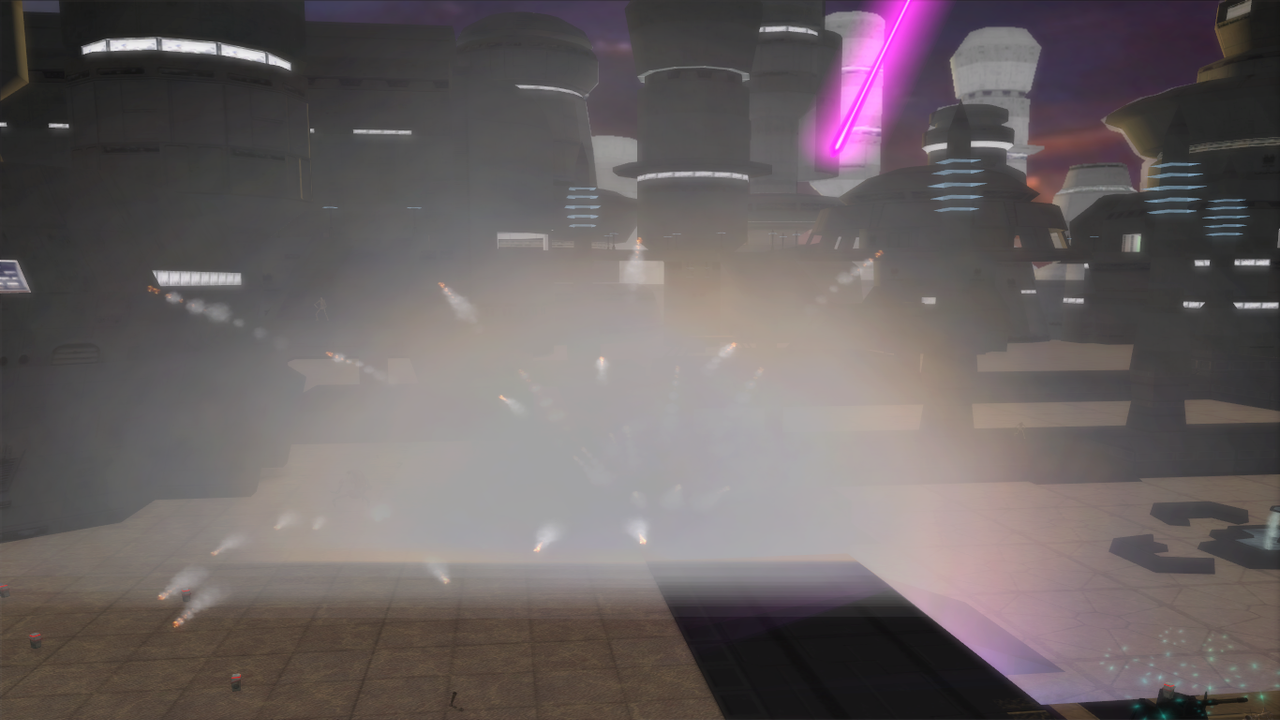
Pretty much every single effect has been redone including lasers. Except for a few I felt where good enough. Includes freecam for SP only, the button is hidden in multiplayer.
If your on a 32-Bit Os it goes here by default C:\Program Files\LucasArts\Star Wars Battlefront\GameData\Data\_LVL_PC\Common\ENG. Or if your on a 64-Bit one it goes here C:\Program Files (x86)\LucasArts\Star Wars Battlefront\GameData\Data\_LVL_PC\Common\ENG.
Feedback welcomed.
http://www.swbfgamers.com/index.php?action=downloads;sa=view;down=481
This mod increases SWBF1s effects quality on what I would call a very high scale.
100% Online compatible.
Pretty much every single effect has been redone including lasers. Except for a few I felt where good enough. Includes freecam for SP only, the button is hidden in multiplayer.
If your on a 32-Bit Os it goes here by default C:\Program Files\LucasArts\Star Wars Battlefront\GameData\Data\_LVL_PC\Common\ENG. Or if your on a 64-Bit one it goes here C:\Program Files (x86)\LucasArts\Star Wars Battlefront\GameData\Data\_LVL_PC\Common\ENG.
Feedback welcomed.
#104
Released Maps and Mods / Bespin: Cloud City Night Time 1.1
March 10, 2012, 07:53:14 PM
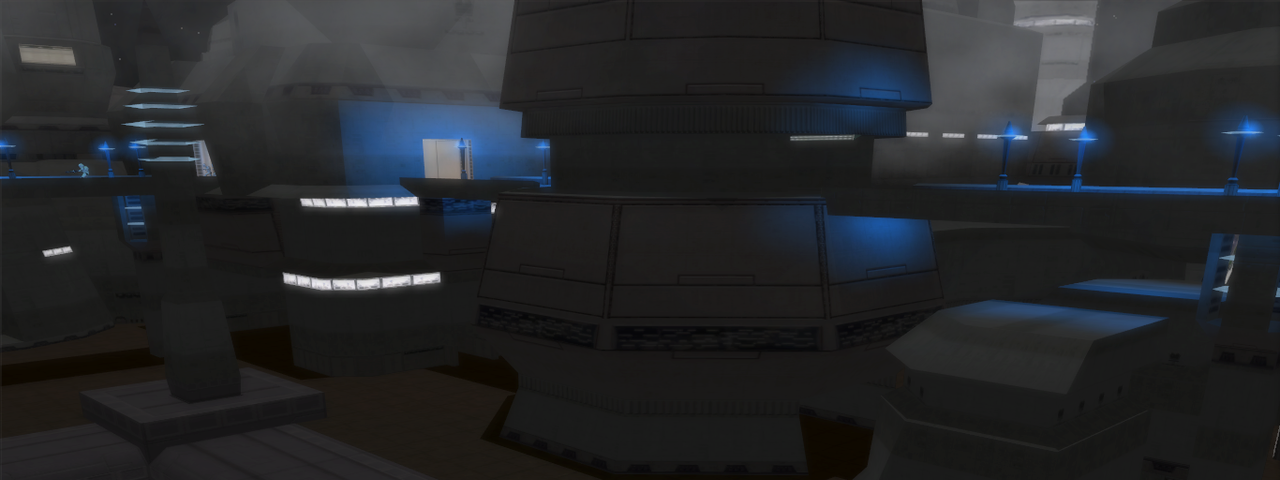
Bespin: Cloud City Night Time 1.1
http://www.swbfgamers.com/index.php?action=downloads;sa=view;down=474
This is a cool and new version. It has bug fixes, and better lighting. Thanks to Phobos for showing me where I could find the code snippet for Stars.
Glamour Shot
File goes in C:Program FilesLucasArtsStar Wars BattlefrontGameDataData\_LVL_PCBES or C:Program Files (x86)LucasArtsStar Wars BattlefrontGameDataData\_LVL_PCBES if your on a 64-Bit os.
#105
SWBF1 Modding / Cloud City Night time - Show case
March 10, 2012, 02:55:25 AM
This by far is one of the coolest things I've made. It's basicly putting SWBF1s lighting system to it's highest use. Give the video a watch and see for yourself.
http://www.xfire.com/video/5544ca/
http://www.xfire.com/video/5544ca/
#106
Released Maps and Mods / Bespin: Cloud City Sunrise
March 07, 2012, 12:44:11 AM
Another lighting mod to freshen up your game.
If all goes to plan a screenshot should be in the attachments.
EDIT Screenshot hack test Hack test.

Simple to install. Just head into Program Files/LucasArts/Star Wars Battlefront/Data/_LVL_PC/BES and put the file in there. Back up the other one by renaming it first.
Download
edit by buckler--local link:
http://www.swbfgamers.com/index.php?action=downloads;sa=view;down=471
If all goes to plan a screenshot should be in the attachments.
EDIT Screenshot hack test Hack test.
Simple to install. Just head into Program Files/LucasArts/Star Wars Battlefront/Data/_LVL_PC/BES and put the file in there. Back up the other one by renaming it first.
Download
edit by buckler--local link:
http://www.swbfgamers.com/index.php?action=downloads;sa=view;down=471
#107
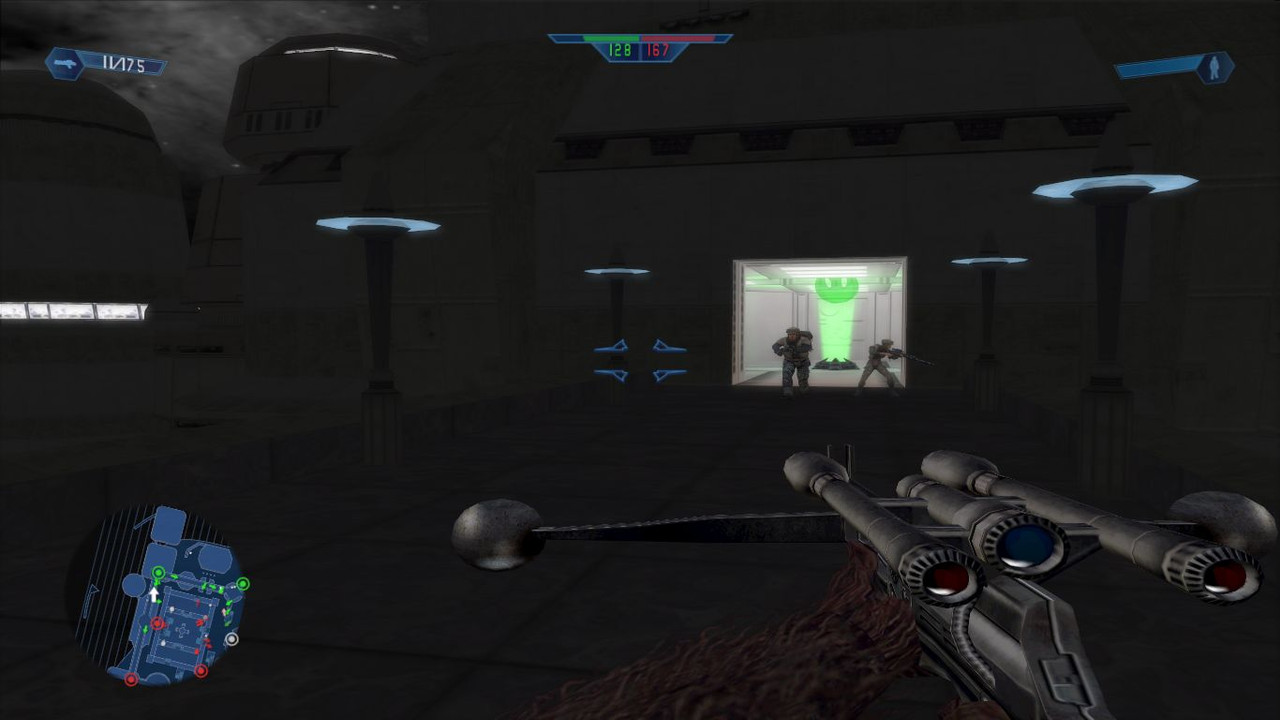
Released Maps and Mods / KAMINO: CLONING FACILITY SWBFII Conversion
March 04, 2012, 05:17:23 PM
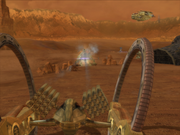
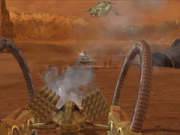
KAMINO: CLONING FACILITY SWBFII Conversion
http://www.swbfgamers.com/index.php?action=downloads;sa=view;down=467
KAMINO: CLONING FACILITY SWBFII Conversion, this is a much cooler Kamino than the SWBF1 one. I hope you enjoy it.
I haven't taken any screenshots, so if anyone feels inclined....
Credits
SleepKiller
tirpider
Led
BattleBelk (Always forget to credit him even though I really should. This time I remembered.)
And a bunch of beta testers that Led had with him who I don't know.
Zach
mrpsy
platypus
#108
SWBF1 Modding / Interface Tool + ifs_pausemenu Builder
March 04, 2012, 02:12:43 AM
As per a request I've modified Interface Tool to include the ability to build ifs_pausemenu.
http://www.mediafire.com/?wdzgnfecfq9femn
edit by buckler: local link
http://www.swbfgamers.com/index.php?action=downloads;sa=view;down=462
Credits
%98 BattleBelk
%1 SleepKiller
%1 Bamdur
http://www.mediafire.com/?wdzgnfecfq9femn
edit by buckler: local link
http://www.swbfgamers.com/index.php?action=downloads;sa=view;down=462
Credits
%98 BattleBelk
%1 SleepKiller
%1 Bamdur
#109
Released Maps and Mods / Tantive Iv SWBFII Conversion
February 27, 2012, 11:07:51 PM
Déjà vu much aye? This is a completely new conversion for Tantive Iv. I started from pretty much scratch with the mind to produce it as bug free as possible. I'm satisfied with the results.

Huge thanks to tirpider for his research/tools!
Download
edit by buckler: swbfgamers.com link
http://www.swbfgamers.com/index.php?action=downloads;sa=view;down=453
Huge thanks to tirpider for his research/tools!
Download
edit by buckler: swbfgamers.com link
http://www.swbfgamers.com/index.php?action=downloads;sa=view;down=453
#110
Released Assets / Darktrooper Battle Sounds
February 25, 2012, 08:29:50 PM
Darktrooper Battle Sounds
http://www.swbfgamers.com/index.php?action=downloads;sa=view;down=448
These are a collection of sounds designed for Darktrooper battle chat. The voice is edited to be deep and sound like it is coming from a Droid.
http://www.swbfgamers.com/index.php?action=downloads;sa=view;down=448
These are a collection of sounds designed for Darktrooper battle chat. The voice is edited to be deep and sound like it is coming from a Droid.
#111
Released Maps and Mods / Bespin: Cloud City Night Time
February 23, 2012, 05:36:05 PM
Bespin: Cloud City Night Time
http://www.swbfgamers.com/index.php?action=downloads;sa=view;down=447
As the title says this is a mod for Bespin: Cloud City that makes it be Night time. This mod isn't like Phobos ones, instead it is a lighting mod. Simple but i think it looks very cool.
http://www.swbfgamers.com/index.php?action=downloads;sa=view;down=447
As the title says this is a mod for Bespin: Cloud City that makes it be Night time. This mod isn't like Phobos ones, instead it is a lighting mod. Simple but i think it looks very cool.
#112
Released Maps and Mods / SWBF SleepKiller Edition 1.0
February 08, 2012, 06:13:16 PM
Go to this topic for info and screenshots. http://www.swbfgamers.com/index.php?topic=4142.0
D/L Link (Around 400 MBs once uncompressed.)
http://www.mediafire.com/?yb1jf5ayx1ri2mj
also available here at:
http://www.swbfgamers.com/index.php?action=downloads;sa=view;down=430
D/L Link (Around 400 MBs once uncompressed.)
http://www.mediafire.com/?yb1jf5ayx1ri2mj
also available here at:
http://www.swbfgamers.com/index.php?action=downloads;sa=view;down=430
#113
Star Wars Battlefront (2004 Original) / Why I hate jets.
February 07, 2012, 08:00:02 PM
Top five reasons why I hate jets.
What are the reasons you hate Jets for? (if you hate them at all.)
Code Select
1. There weapons compared to the other special classes are easier to use and more powerful.
2. The Republic one has six Thermal Detonators.
3. The Empire one has four Thermal Detonators.
4. They fly giving them a huge advantage, yet they have the same amount of health as other units.
5. They can be spammed, resulting in a heavily a bad play experience for the other team.
What are the reasons you hate Jets for? (if you hate them at all.)
#114
SWBF1 Modding / Is there a way to disable flinching?
February 03, 2012, 05:19:01 PM
I think the title said it all well enough. Is there a way to disable flinching through ODFs?
#115
Released Maps and Mods / SWBF SleepKiller Edition Beta
February 03, 2012, 02:06:08 PM
The first public release of this mod. Now I understand my information topic http://www.swbfgamers.com/index.php?topic=4142.0 may not quite be good enough to make you want to download the mod. But if you could just give it a download and tell me what you think I'd really love you for it.
Key features,
Doesn't impact on-line play at all!
Easy to install/uninstall.
The maps for this mods are the ones below YAVIN IV, So after the first to Yavins go by in the list you'll see BESPIN: PLATFORMS all these maps (Until you hit mod maps.) are the mods ones. I understand this is confusing and it will be fixed for future versions of the mod.
http://www.mediafire.com/?r3yyasf21tlxtlu
Click that! ^^^
Feel free to give suggestions!
#116
Released Maps and Mods / VENATOR: INTERIOR
February 02, 2012, 11:37:14 PM
VENATOR: INTERIOR
http://www.swbfgamers.com/index.php?action=downloads;sa=view;down=429
EDIT by buckler: SWBFgamers link updated to include most recent update (still does not work for Mac)
http://www.mediafire.com/?ld5wln90v96b6bn
Have you ever wanted to fight inside a Venator? Well now you can, with this handy little map. You'll be fighting to push the CIS out of the ship or to kill the Clones on the ship. Pick up your gun and fight!
Enjoy the map.
#117
SWBF1 Modding Tutorials / SWBFII Map Conversion Tutorial[WIP]
January 28, 2012, 11:07:11 PM
Old outdated and porting SWBF2 maps in an unpredictable process. Kept here for archive purposes.
[spoiler]Okay, I'm going to start writing a Tutorial on how to convert SWBFII maps. This won't be complete for a few days probably. The sections will be put into spoilers so you keep your focus on the section your in. In some sections you'll see *** this is a place holder for the name of the world you want to convert.
Tools you need.
NotePad++ http://notepad-plus-plus.org/
xvi32 http://www.chmaas.handshake.de/delphi/freeware/xvi32/xvi32.htm
SWBF1 and 2 Modtools
SWBF2 Terrain Munger http://www.swbfgamers.com/index.php?topic=4130.0
Common Sense http://en.wikipedia.org/wiki/Common_sense
Paint.Net http://www.getpaint.net/
Things preferred.
SleepKiller Logic (Not required but it is advised you have this.)
Step 1. Convert the terrain.
[spoiler]This part is really easy. For starters decide what world you want to convert. Once you know this go into its assets folder in your copy of SWBFII Modtools. Select ***.ter press Ctrl + C leave this folder and navigate to where you extracted SWBFIITerrianMunger go into this and enter the folder terrain. Press Ctrl + V. Go back up into SWBFIITerrianMunger. Double click on Munge.
Okay Now leave this Window open, open a new one by clicking on My Computer in your start menu. Navigate to your BFBuilder folder. Open BFBuilder or BFBuilder Pro. Create a new projected called the world ID of the map your converting. I.e dag1, cor1. Now go into the newly created folder and go to the Worlds folder inside it you'll see a folder call *** enter this folder. Leave this Window up!
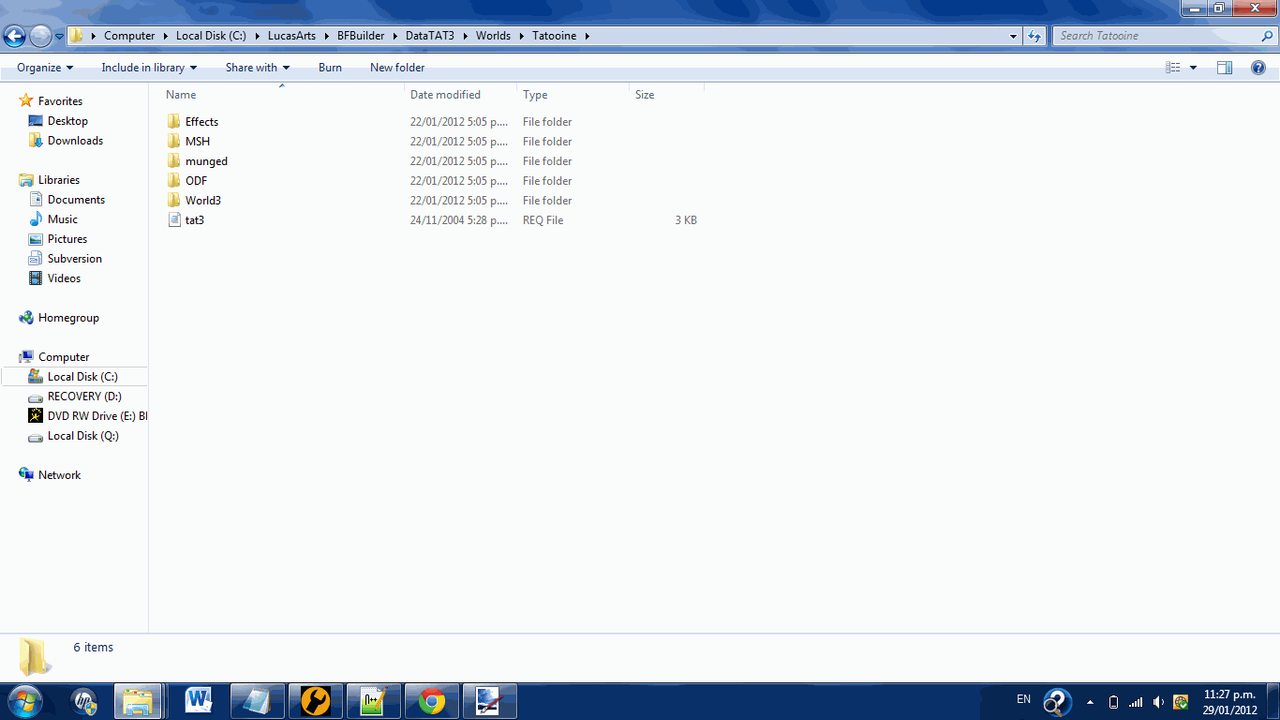
Go into a new Window now go to the same place we went to grab our terrain except go 1 folder level above this you should see these 5 folders
ODF
MSH
Munged
Effects
World1
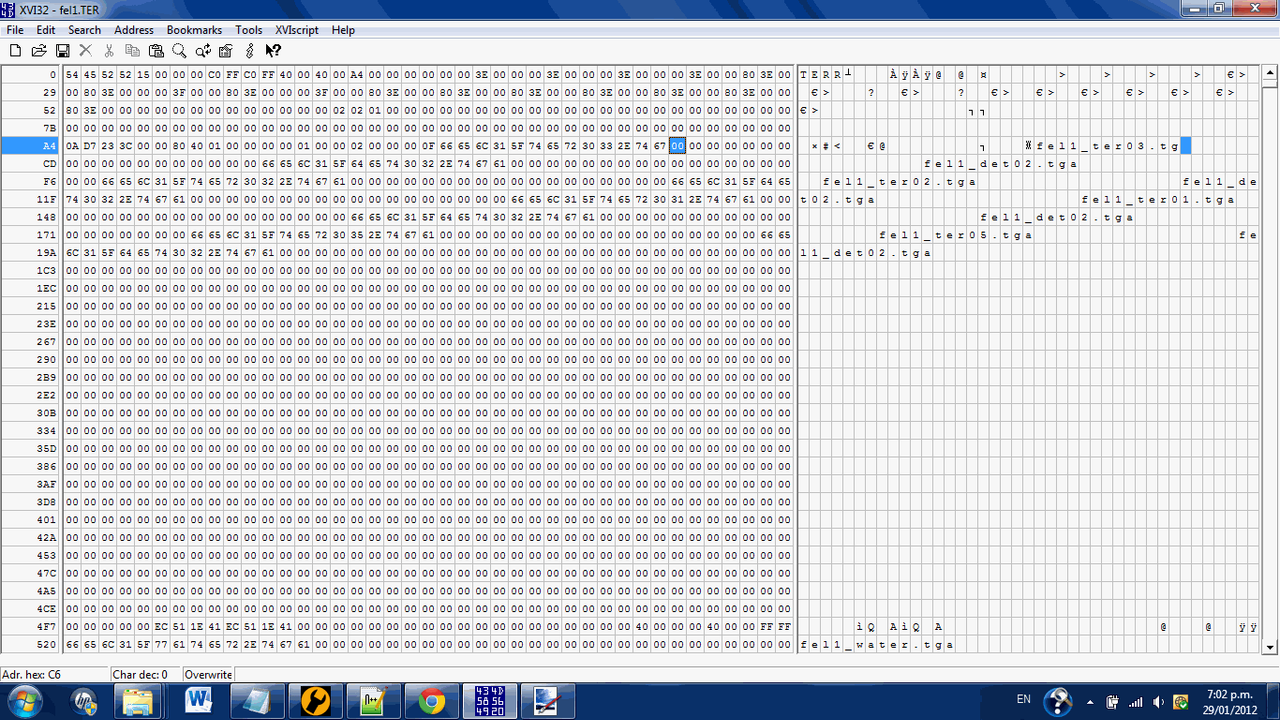
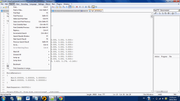
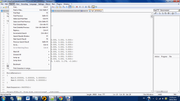
Select all these and press Ctrl + C. (Now close this window.) Go back into the other window we recently minimized (Not the terrain one!) and press Ctrl + V. Great, now leave this Window open again. Make a new one and navigate to where you put XVi32 now open XVi32 (Close this Window now.) . Go back into the Window where we just copied the world data. Enter the World1 folder find ***.ter drag this file onto XVi32's Window it should open it up and look like this.

Now follow the instructions in this image.(Click on it to gain a better image.)
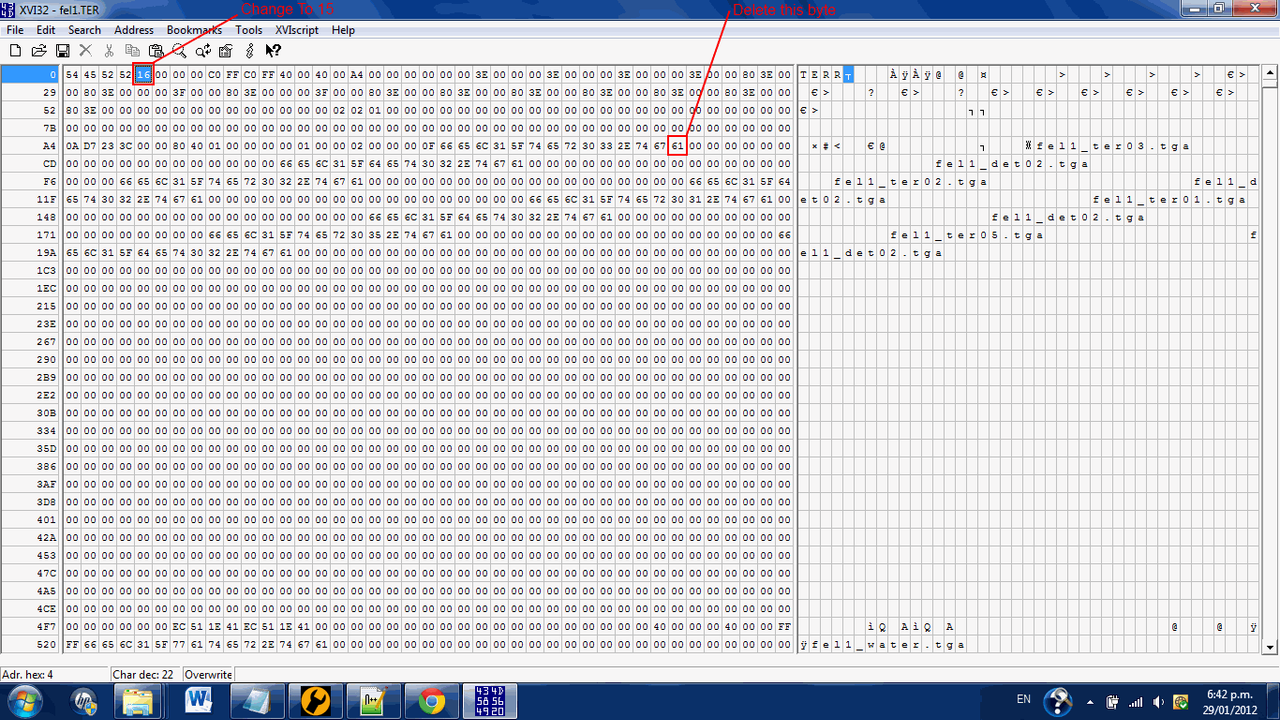
You should now have a file that looks like this, if so save and exit.
Okay now go back up to the folder that contains
ODF
MSH
Munged
Effects
World1
Once their go into Munged. Then go back to the Window we abandoned called SWBFIITerrianMunger go into the Munged folder in this one as well. Select ***.terrain and press Ctrl + C. Exit the Window. Now we should only have one Window still up, press Ctrl + V in this Window. Go back up into your projects base directory (This should have the Zero Editor EXE in. If it doesn't your in the wrong place!)
Okay now go into _BUILd_PC/Worlds/ from their Left Click on munge_world.bat and hit Edit With Notepad++
This may and probably will look like mumbo jumbo never fear! All you have to do is find this line
One you have found it simply type REM in front of it.
It should now look like this.
Congratulations you have just completed Step 1. It is not ready for munging yet, so don't try it!
[/spoiler]
Step 2. Make it Usable
[spoiler]Now if you where to munge this right now you'd get a crashing game. So we've got to hammer it into a state that isn;t going to crash. This part is simple and very important! First off Assuming we still have our World folder Window still up. In case you haven't caught on yet it is the one with
ODF
MSH
Munged
Effects
World1
in it.
Now go into World1, you'll see a lot of files here and which ones there are will vary World to World. But simply put we only need to worry about a few of these Any file with a .lyr and .wld extension you need to open up in the same manor we did with the .bat file. And find this line in all of them. (The line does vary World To World Layer To Layer. But here is the basic format.
Select and press back space over this line then save the file. Repeat this process for each of the .lyr and .wld files.
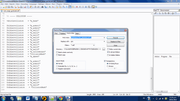
Now close Notepad++ and once your looking at the mass of world data files again. Go back up to your base project directory (The one with the Zero Editor Application in.) . Right click on config.ini (You won't see the .ini.) and click on Properties. Here is another picture follow the instructions in it. (Note depending on your OS the screen may look different. But the boxes will still be there.)
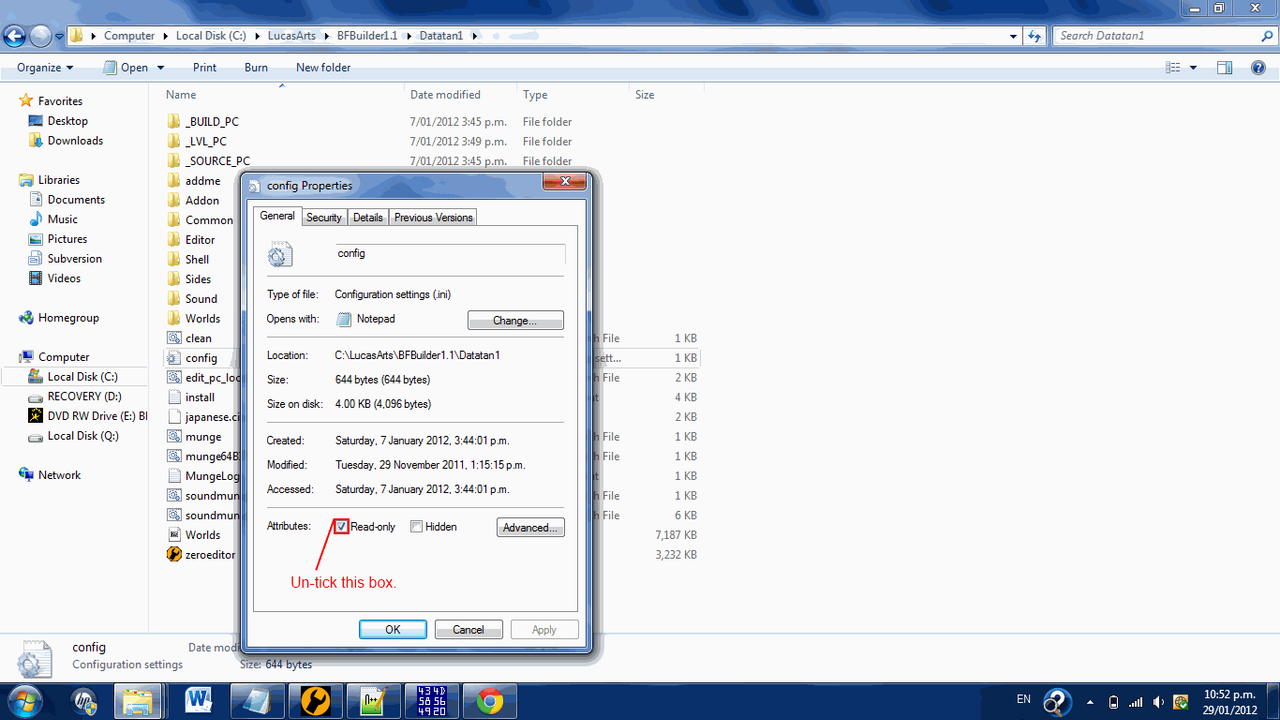
Once you've unchecked the box, hit Ok. (Note I'm not sure if this is essential on all Windows versions.
Now go and open config.ini in Notepad++
Look at the top four lines
Change to your Monitors resolution if you want. Now got to the bottom of the file. And put this line there.
Save the file.
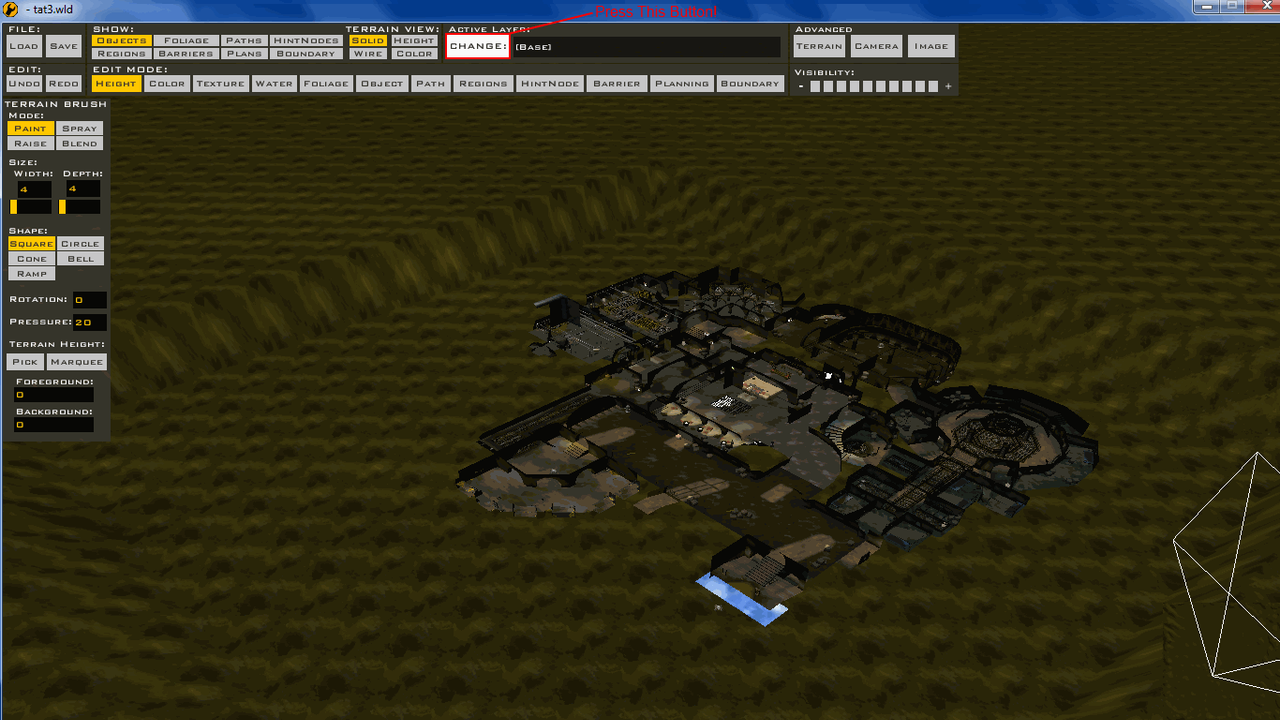
Now lets try opening this thing in ZeroEdit open up ZeroEdit it'll probably shoot you to the directory of the world you last opened with ZeroEdit, please go back up to your BFBuilder directory and from there into your project folder. Once there go to Worlds/***/World1 open up ***.wld. You may get some errors complaining about missing ODFs, ignore them we are about to remedy that very thing.
Now in this picture you'll see the magic red text pointing you towards a button. Press it.
Now you see the magical red text showing you the button to delete layers. Delete every layer that has the word sound in it. And delete every layer that is Called 1flag, TDM, Hunt, CTF, Campaign. (I think that is all of them.)
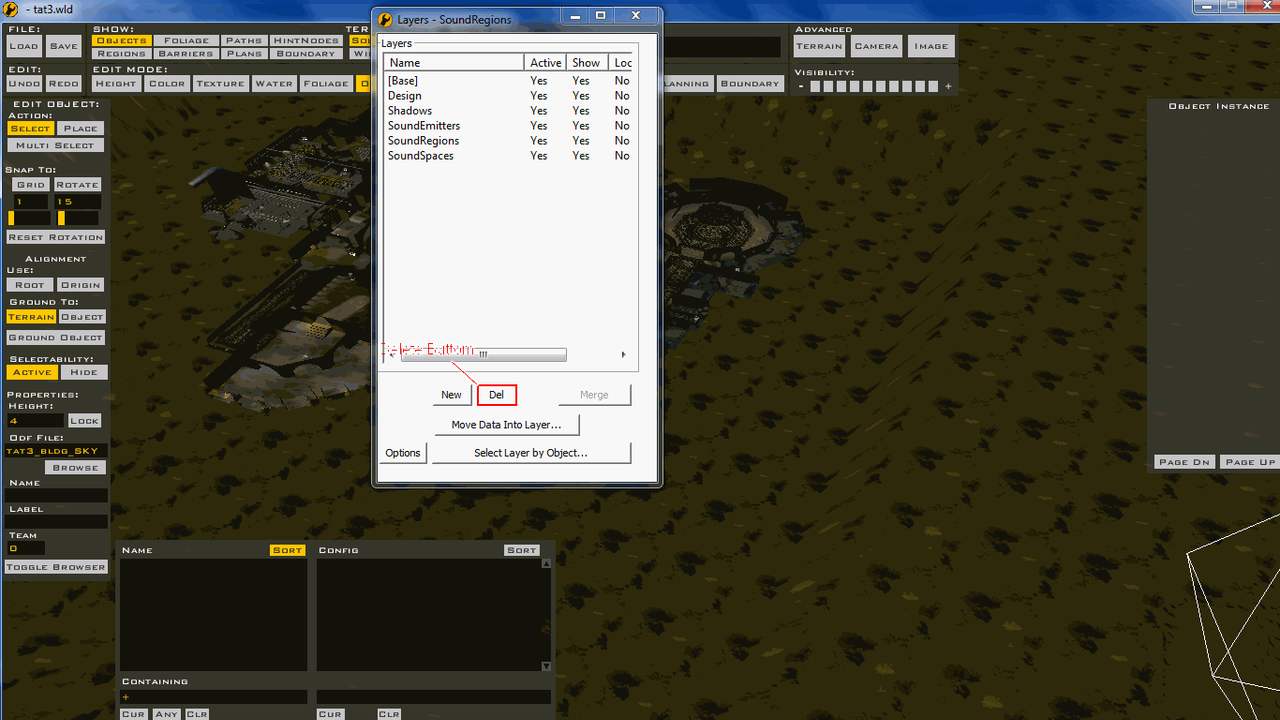 Now save the world. And exit Zero Edit.
Wow we're almost ready to munge! Exciting. There is one more thing in this step to do though.
Open up Notepad++ through the Start Menu or Edit With NotePad++. The point is open it.
In these pictures your going to move your mouse where I move my mouse okay?
Click here now.
Fill out this information form.
In Find What put
ODF
MSH
Munged
Effects
World1
Now see this picture
You notice the address bar just below the top of the Window double click on this in your Window and press Ctrl+C.
Go back to NotePad++ and double click in the Directory field in the form and press Ctrl+V. Now press Replace In Files.
Now that is the end of Step 2. You should now be able to munge and test it out in-game. (It may crash which is why Step.3 is on debugging it.) BTW, sorry bout the NotePad++ images being Thumbnails don't know what happened
[/spoiler]
Step 3. Debugging
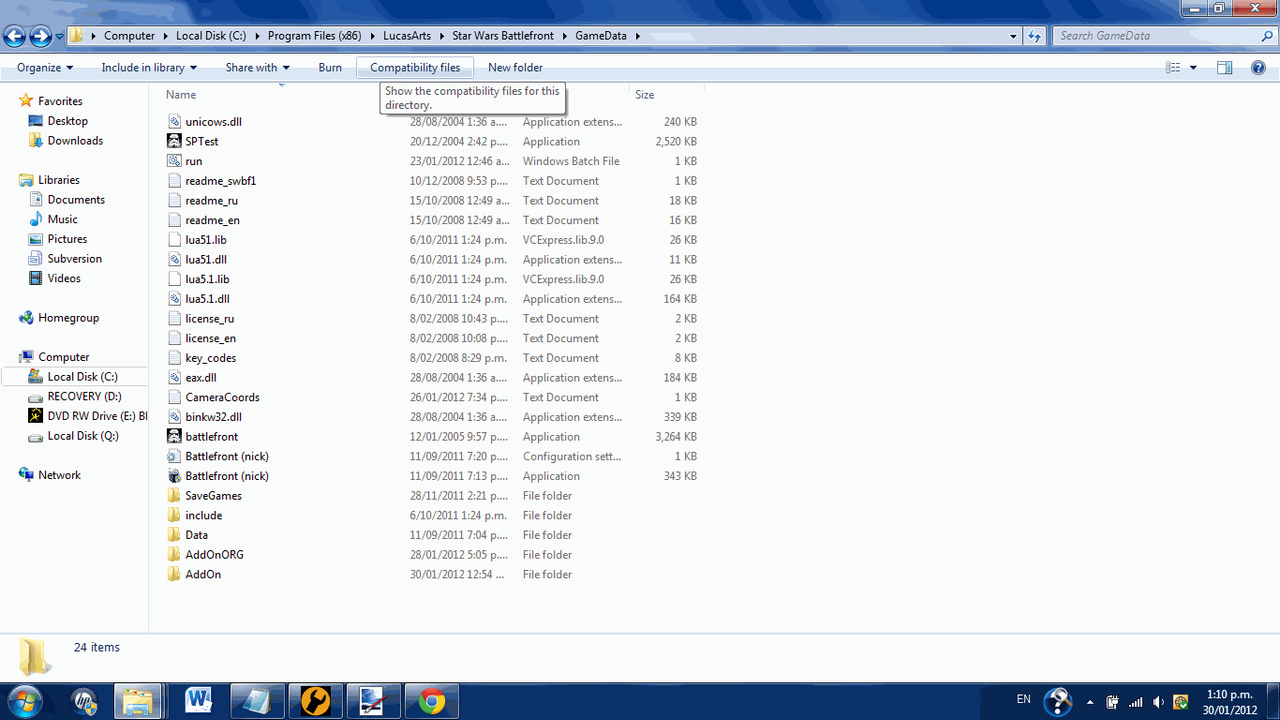
[spoiler]If it didn't crash that is great! But you still have to read this step. Now in this part I can't offer much guidance on how to fix the errors since I don't know what you'll get. But I can give basic instructions to the concept. First off, we're going to go into the Assets folder of our BFBuilder folder in here you'll see an EXE call SPTest click on it and press Ctrl + C. Now go to where SWBF Is installed C:\Program Files (x86)\LucasArts\Star Wars Battlefront\GameData for 64-Bit users and C:\Program Files\LucasArts\Star Wars Battlefront\GameData for 32-Bit users. Once there press Ctrl + V. Now SPtest is installed and ready to do the hard work of debugging for you! Now open SPTest you'll see it runs just like the normal game but with no Multiplayer and a half the screen is green. Simply run your map in this and it'll produce a file called BFront.log it'll just appear as a text file though with no extension. (If your on Windows 7 it'll drop into Compatibility Files just go into them to retrieve it.)
Now you'll see a bunch of errors in the document. Most likely saying CP* is not localized for the stats page. Bla, bla, bla. Now anyones complaining about missing localizations/movies you can ignore. Now I'm going to have to let you figure out how to solve them since I don;t know every single error off the top of my head 9 do know how to solve most of them though.) So if your Unsure of what an error is and how to solve it. Post here with your BFront.log and I'll help you solve and add it to a list of errors and how to fix them.
Dealing dealing with missing ODF files - Sometimes you'll get an error saying that it can't find an ODF file for an object. This is simply fixed open NotePad++ and copy this into it.
And save the file in your Worlds ODF directory as the name of the missing ODF.
As I think of more errors that sometimes pop up when converting a map. I'll post more explanations here on how to solve them.
[/spoiler]
Step 4. Fixing the collision.
[spoiler]Okay this bit is probably going to scare you a lot. But don't get discouraged now, if you successfully debugged the world and it is now running you are going good. This part is going to take you several Days to do (Depending on how much time you devote to it. When I was converting Tantive Iv I used invisible collision blocks I worked on it several hours each day for about a weak.) So don't get discouraged on some maps most of the Collision is OK and you have very little work for you to do yourself. But on others like Tantive 50% of the map is glitch filled and buggy. Don't fear unlike debugging I can give you loads of help and advice on this subject.
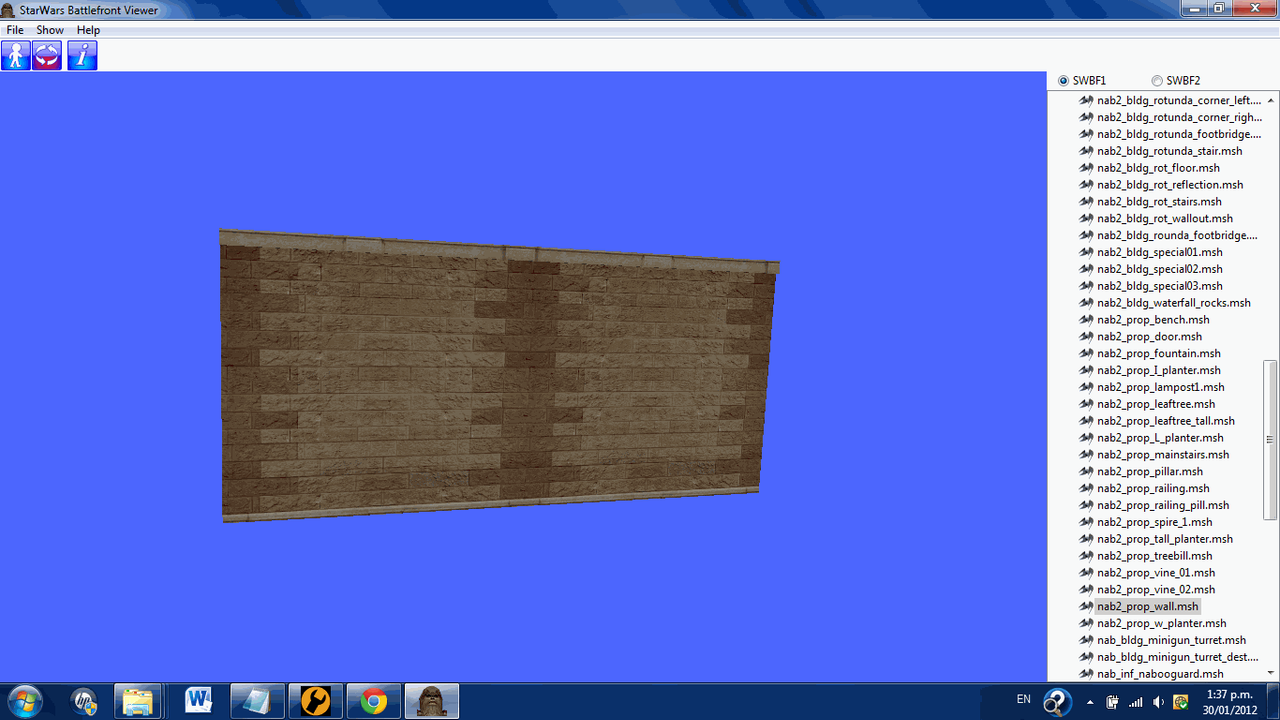
Okay first off let's say we're trying to convert the Jedi Temple right? So the collision blocks Pandemic has given us are way to big in most cases for the job. Don't panic! We're just going to make our own invisible collision. First step find a model in the stock assets that is right for the job. We need something that is thin for the walls and we need something that is tall and thin for the library pillars. (The stock invisible collision blocks do okay for the floor. In most cases.) Okay so I'm going to show you how to get that thin model for the walls. First off as I said find the model we want, nab2_prop_wall.msh happens to fulfilled this requirement nicely. Hm but we have a problem don't we.
Oh dear, what is this madness SleepKiller is talking! The model will show up and ruin the look of the map! Okay, okay hang in there for starters. Go into your BFBuilder directory from there go to Assets/Shipped Worlds/Naboo/MSH. Open a new Window and leave that last one up. So in the new Window go into your Projects base directory. (You should know by now but it is the one with Zero Editor in.) From there go Worlds/***/MSH. Go back into the old Window and find these two files
nab2_bldg_brick04.tga
nab2_bldg_brick04.tga.option
Select them and press Ctrl + C. Go into the other Window and press Ctrl + V. Now back into the other Window and find these to files
nab2_prop_wall.msh
nab2_prop_wall.msh.option
Once again press Ctrl + C on them and go into the other Window and press Ctrl + V again. Now select the four files we just copied over and press Ctrl + C on them. Go into the other Window and with it navigate to My Documents. Once there make a new folder called Collision Fixing, enter the newly made folder and press Ctrl + V. Okay on these four files we have in this window I want you to rename the nab in all of them to col. so they now look like
col2_prop_wall.msh
col2_prop_wall.msh.option
col2_bldg_brick04.tga
col2_bldg_brick04.tga.option
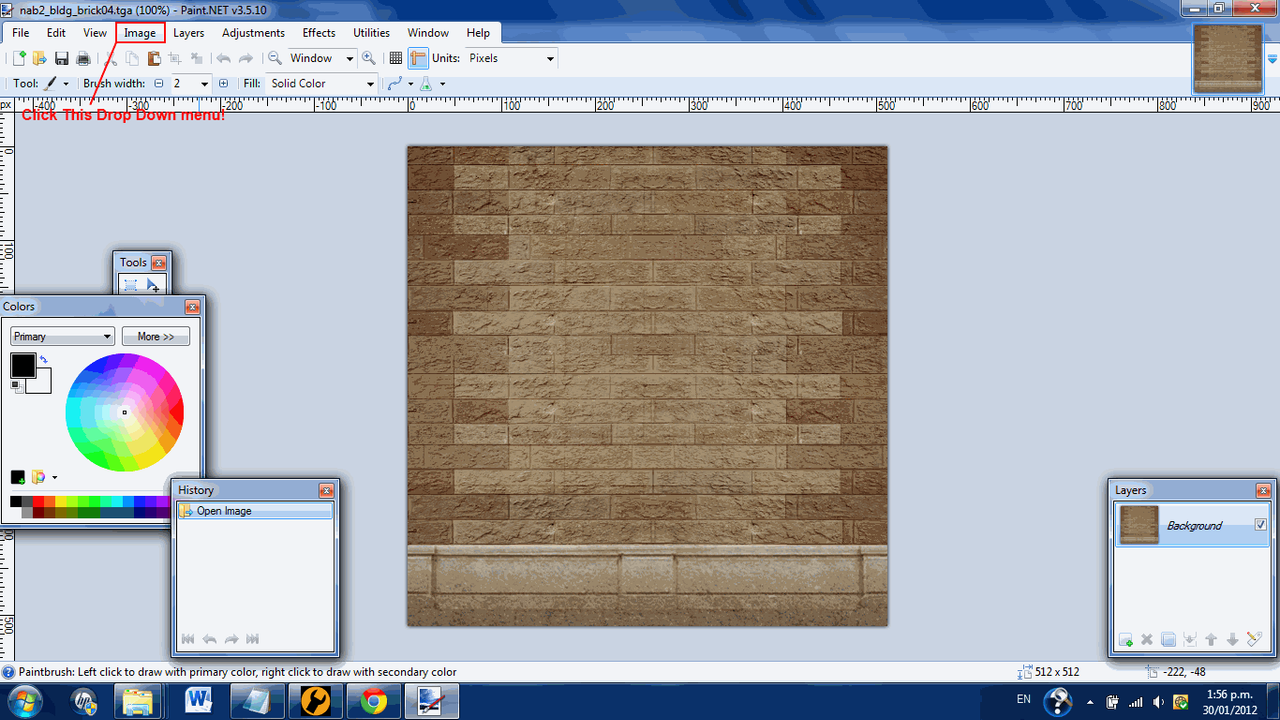
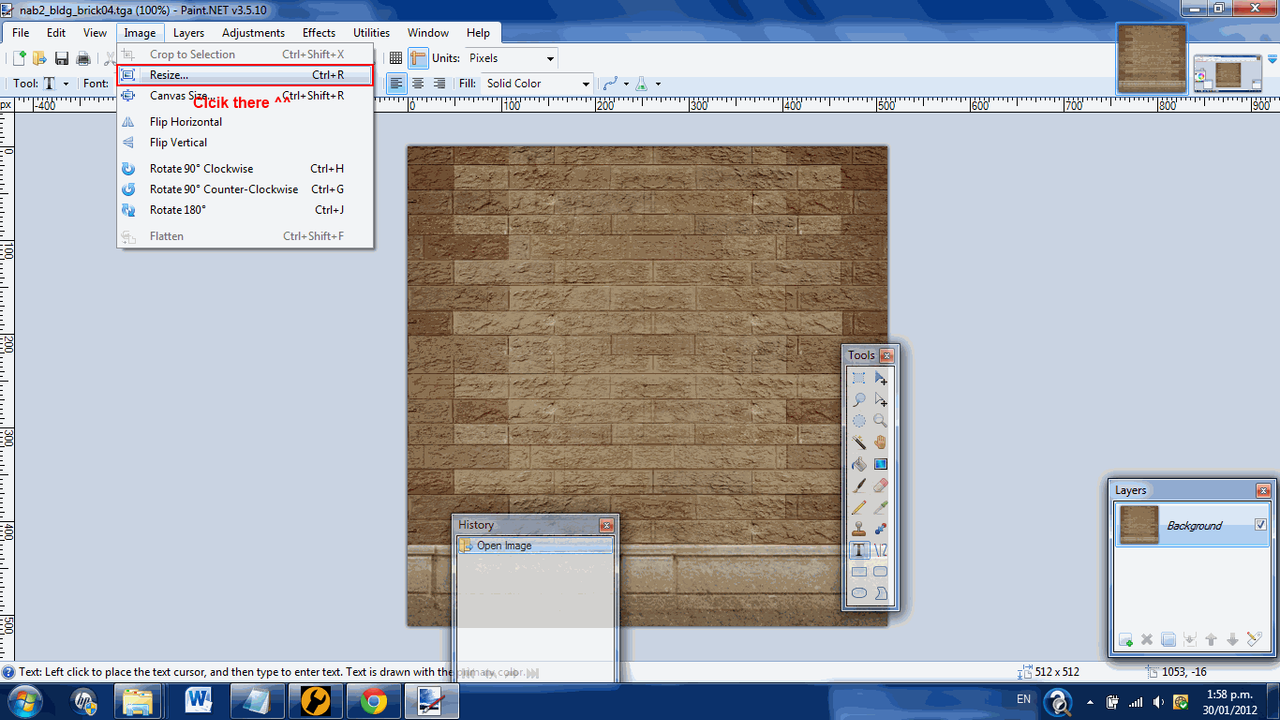
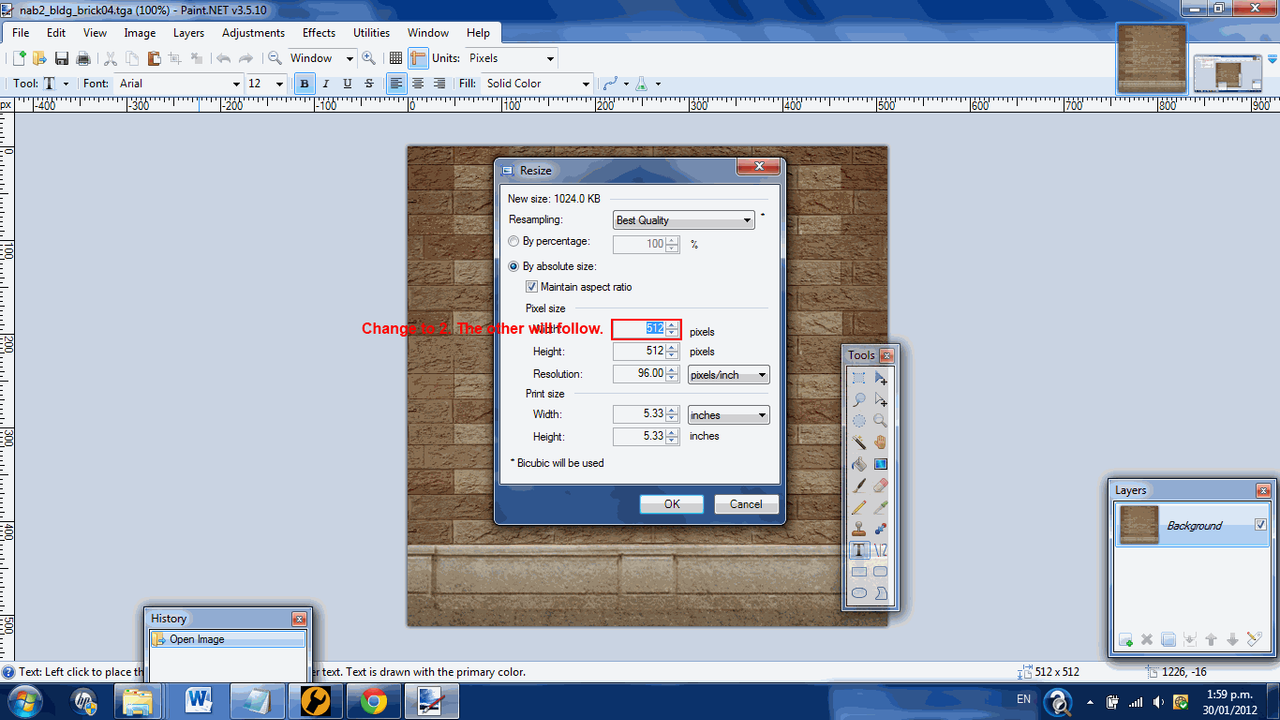
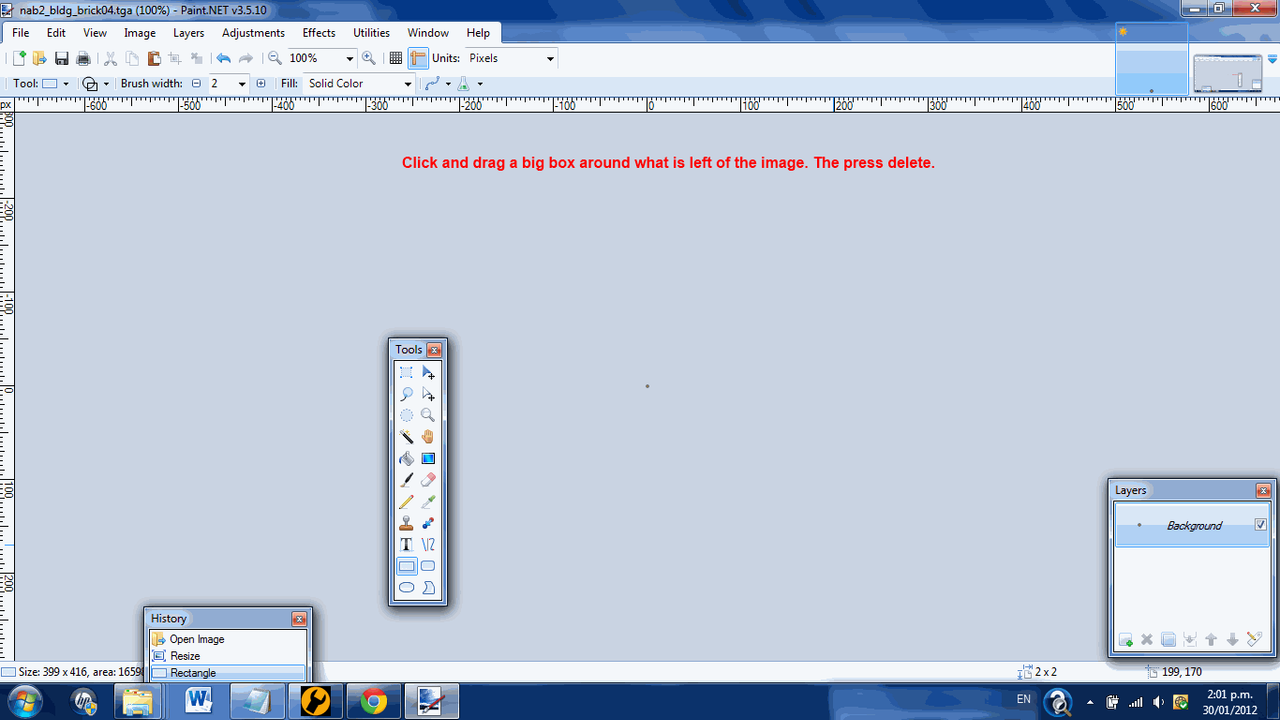
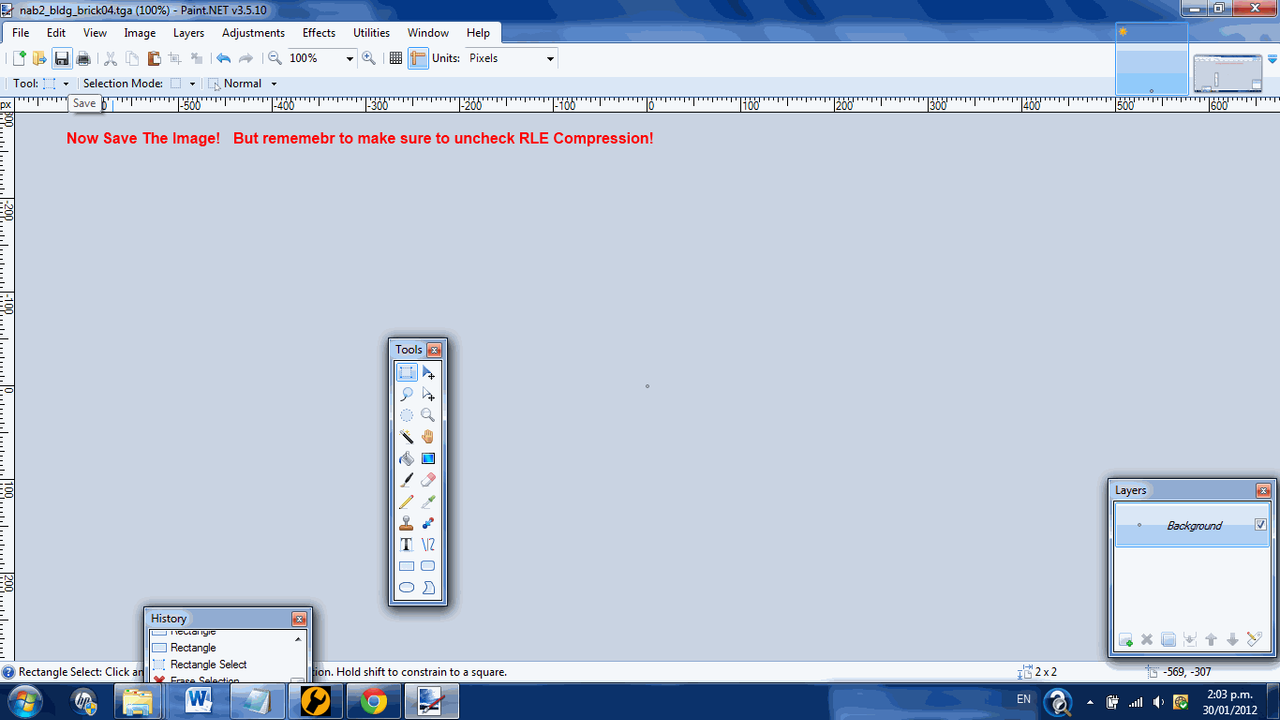
Excellent now open Paint.Net and go back into the window containing the files we just renamed. Drag col2_bldg_brick04.tga into the Paint.Net window it will ask you what you want to do with it open it. Now here is another follow my mouse picture series.

Now that we've done that exit Paint.Net leave the Window with
col2_prop_wall.msh
col2_prop_wall.msh.option
col2_bldg_brick04.tga
col2_bldg_brick04.tga.option
in up. Then open up XVi32 and drag col2_prop_wall.msh onto its window. Press Ctrl + F. In the Text String box type .tga. Now if you go up one line from where it sent you, you'll see 00 00 48 42 41 54 52 42 04 00 00 00 00
change this to 00 00 48 42 41 54 52 42 04 00 00 00 04. Now go to the very end of this line, click in the text view box now instead of the HEX View (The one that contains letters that make sense to you.) The last two letters you'll see on the line are na change these to co. Go down to the next line the first letter is b change this to l. Save the file now and exit Xvi32.
Now select the four files
col2_prop_wall.msh
col2_prop_wall.msh.option
col2_bldg_brick04.tga
col2_bldg_brick04.tga.option
And press Ctrl+X Find your way back to your projects World/***/MSH folder and press Ctrl + V. Cool, now go back up into ***. From there into ODF open any ODF with NotePad++ copy and paste this code into the ODF
Now save the ODF as com_inv_wall.odf (Go save it in Data***/Worlds/***/ODF/).
Okay I really can;t help you much with what comes next it is simple yet long work. Here is a basic outline of how to do it. We've made our special invisible collision for the World so we can place them in tight spots. See Appendix A for a list of invisible collision objects and where to find them.
I now presume you know roughly how to place objects in Zero Editor. If not go to your BFBuilder directory form there go into Documentation. And double click on Zeroedit read the web page that pops up through and through. (Sorry about not explaining this part more it is just a whole other thing completely.)
Now here is some tips to help make your Invisible Collision placing much more easy.
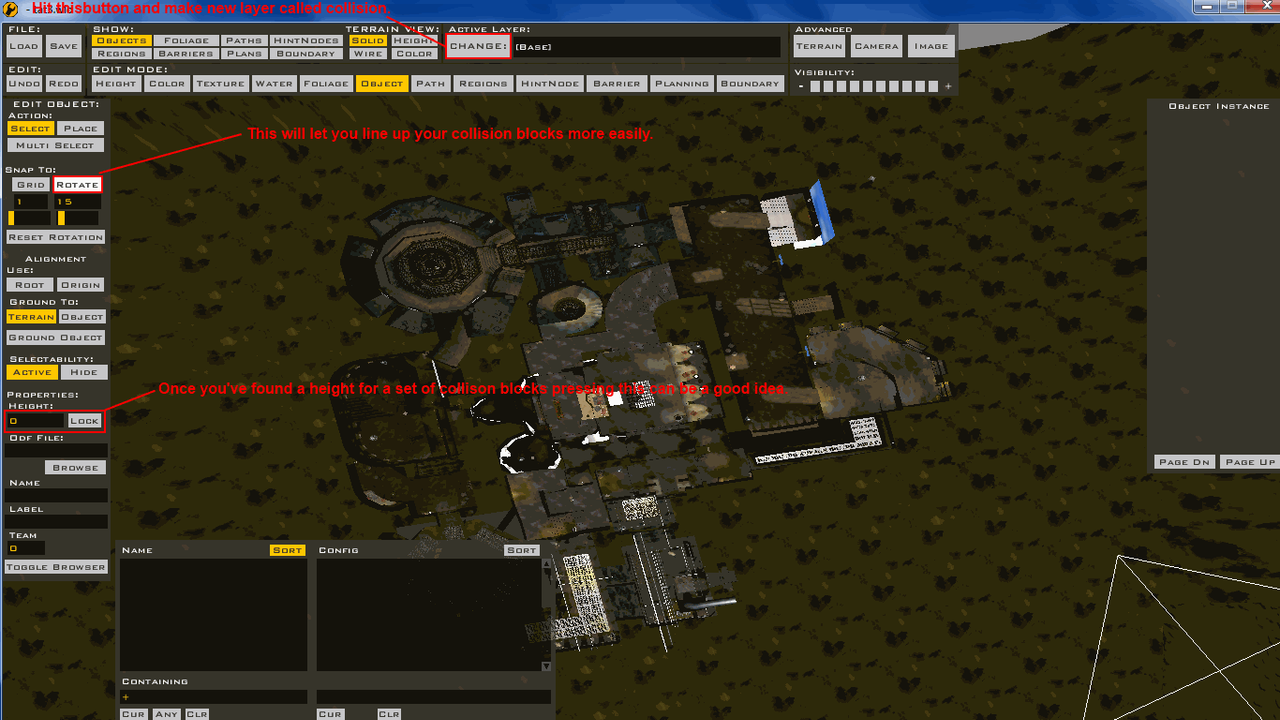
Now the process becomes test in-game. Find the spots with no collision, patch them up in the editor. Repeat it until your map is complete Be careful of placing too many objects though I'll be writing an Appendix on how to deal with this if you do. Until Step 5. !
[/spoiler]
Step 5. Fixing The Lighting. Not finished only just started, don't try reading it.
[spoiler]Now SWBF1 and SWBF2 have completely different lighting systems. This does not mean we can not convert the system into SWBF1's system. First off go into your World1 folder(You should be familiarized with it by now.) find ***.lgt and open it with NotePad++. Then find ***.sky also open this with NotePad++. Close anything else you have in NotePad++ up. Leave NotePad++ up. Now open your Start Menu and go, All Programs/LucasArts/Star Wars Battlefront II/Mod tools/ and open Star Wars Battlefront II Mod Tools. It'll ask you to fill out some information regarding what you want to make your New World be just fill out the basic information. Conquest Gamemode some random stuff for the description and name. Create it.[/spoiler]
Appendix A
[spoiler]com_inv_col_8 - Data***/Common/ODF/
com_inv_col_16 - Data***/Common/ODF/
com_inv_col_32 - Data***/Common/ODF/
com_inv_col_64 - Data***/Common/ODF/
com_inv_wall - Data***/Worlds/***/ODF/
[/spoiler]
Stand by for Step 5. What do you think of it so far? Is it understandable? Is it instructive? Please tell me.
Also if you find the Tutorial is not working for you let me know, the odds are I left out some curial piece of information. If I have I'll fix it A.S.A.P[/spoiler]
[spoiler]Okay, I'm going to start writing a Tutorial on how to convert SWBFII maps. This won't be complete for a few days probably. The sections will be put into spoilers so you keep your focus on the section your in. In some sections you'll see *** this is a place holder for the name of the world you want to convert.
Tools you need.
NotePad++ http://notepad-plus-plus.org/
xvi32 http://www.chmaas.handshake.de/delphi/freeware/xvi32/xvi32.htm
SWBF1 and 2 Modtools
SWBF2 Terrain Munger http://www.swbfgamers.com/index.php?topic=4130.0
Common Sense http://en.wikipedia.org/wiki/Common_sense
Paint.Net http://www.getpaint.net/
Things preferred.
SleepKiller Logic (Not required but it is advised you have this.)
Step 1. Convert the terrain.
[spoiler]This part is really easy. For starters decide what world you want to convert. Once you know this go into its assets folder in your copy of SWBFII Modtools. Select ***.ter press Ctrl + C leave this folder and navigate to where you extracted SWBFIITerrianMunger go into this and enter the folder terrain. Press Ctrl + V. Go back up into SWBFIITerrianMunger. Double click on Munge.
Okay Now leave this Window open, open a new one by clicking on My Computer in your start menu. Navigate to your BFBuilder folder. Open BFBuilder or BFBuilder Pro. Create a new projected called the world ID of the map your converting. I.e dag1, cor1. Now go into the newly created folder and go to the Worlds folder inside it you'll see a folder call *** enter this folder. Leave this Window up!
Go into a new Window now go to the same place we went to grab our terrain except go 1 folder level above this you should see these 5 folders
ODF
MSH
Munged
Effects
World1
Select all these and press Ctrl + C. (Now close this window.) Go back into the other window we recently minimized (Not the terrain one!) and press Ctrl + V. Great, now leave this Window open again. Make a new one and navigate to where you put XVi32 now open XVi32 (Close this Window now.) . Go back into the Window where we just copied the world data. Enter the World1 folder find ***.ter drag this file onto XVi32's Window it should open it up and look like this.
Now follow the instructions in this image.(Click on it to gain a better image.)
You should now have a file that looks like this, if so save and exit.
Okay now go back up to the folder that contains
ODF
MSH
Munged
Effects
World1
Once their go into Munged. Then go back to the Window we abandoned called SWBFIITerrianMunger go into the Munged folder in this one as well. Select ***.terrain and press Ctrl + C. Exit the Window. Now we should only have one Window still up, press Ctrl + V in this Window. Go back up into your projects base directory (This should have the Zero Editor EXE in. If it doesn't your in the wrong place!)
Okay now go into _BUILd_PC/Worlds/ from their Left Click on munge_world.bat and hit Edit With Notepad++
This may and probably will look like mumbo jumbo never fear! All you have to do is find this line
Code Select
terrainmunge -sourcedir ..\..\..\Worlds\%1 -platformdir ..\..\..\_source_pc\Worlds\%1 -platform pc -inputfile !*.ter -outputdir munged\ -checkdate -continueOne you have found it simply type REM in front of it.
It should now look like this.
Code Select
REM terrainmunge -sourcedir ..\..\..\Worlds\%1 -platformdir ..\..\..\_source_pc\Worlds\%1 -platform pc -inputfile !*.ter -outputdir munged\ -checkdate -continueCongratulations you have just completed Step 1. It is not ready for munging yet, so don't try it!
[/spoiler]
Step 2. Make it Usable
[spoiler]Now if you where to munge this right now you'd get a crashing game. So we've got to hammer it into a state that isn;t going to crash. This part is simple and very important! First off Assuming we still have our World folder Window still up. In case you haven't caught on yet it is the one with
ODF
MSH
Munged
Effects
World1
in it.
Now go into World1, you'll see a lot of files here and which ones there are will vary World to World. But simply put we only need to worry about a few of these
Any file with a .lyr and .wld extension you need to open up in the same manor we did with the .bat file. And find this line in all of them. (The line does vary World To World Layer To Layer. But here is the basic format.Code Select
LightName("***.LGT");Select and press back space over this line then save the file. Repeat this process for each of the .lyr and .wld files.
Now close Notepad++ and once your looking at the mass of world data files again. Go back up to your base project directory (The one with the Zero Editor Application in.) . Right click on config.ini (You won't see the .ini.) and click on Properties. Here is another picture follow the instructions in it. (Note depending on your OS the screen may look different. But the boxes will still be there.)
Once you've unchecked the box, hit Ok. (Note I'm not sure if this is essential on all Windows versions.
Now go and open config.ini in Notepad++
Look at the top four lines
Code Select
startWindowed = 1
windowWidth = 1024
SkipLA = 1
windowHeight = 768
Change to your Monitors resolution if you want. Now got to the bottom of the file. And put this line there.
Code Select
FlipModelX = 1Save the file.
Now lets try opening this thing in ZeroEdit open up ZeroEdit it'll probably shoot you to the directory of the world you last opened with ZeroEdit, please go back up to your BFBuilder directory and from there into your project folder. Once there go to Worlds/***/World1 open up ***.wld. You may get some errors complaining about missing ODFs, ignore them we are about to remedy that very thing.
Now in this picture you'll see the magic red text pointing you towards a button. Press it.
Now you see the magical red text showing you the button to delete layers. Delete every layer that has the word sound in it. And delete every layer that is Called 1flag, TDM, Hunt, CTF, Campaign. (I think that is all of them.)
Now save the world. And exit Zero Edit.Wow we're almost ready to munge! Exciting. There is one more thing in this step to do though.
Open up Notepad++ through the Start Menu or Edit With NotePad++. The point is open it.
In these pictures your going to move your mouse where I move my mouse okay?
Click here now.
Fill out this information form.
In Find What put
Code Select
tur_bldg_laser In Replace With put Code Select
com_weap_gunturret Cool now this part is very important! Minimize NotePad++ Go back to the World directory the one where we can find ODF
MSH
Munged
Effects
World1
Now see this picture
You notice the address bar just below the top of the Window double click on this in your Window and press Ctrl+C.
Go back to NotePad++ and double click in the Directory field in the form and press Ctrl+V. Now press Replace In Files.
Now that is the end of Step 2. You should now be able to munge and test it out in-game. (It may crash which is why Step.3 is on debugging it.) BTW, sorry bout the NotePad++ images being Thumbnails don't know what happened
[/spoiler]
Step 3. Debugging
[spoiler]If it didn't crash that is great! But you still have to read this step. Now in this part I can't offer much guidance on how to fix the errors since I don't know what you'll get. But I can give basic instructions to the concept. First off, we're going to go into the Assets folder of our BFBuilder folder in here you'll see an EXE call SPTest click on it and press Ctrl + C. Now go to where SWBF Is installed C:\Program Files (x86)\LucasArts\Star Wars Battlefront\GameData for 64-Bit users and C:\Program Files\LucasArts\Star Wars Battlefront\GameData for 32-Bit users. Once there press Ctrl + V. Now SPtest is installed and ready to do the hard work of debugging for you! Now open SPTest you'll see it runs just like the normal game but with no Multiplayer and a half the screen is green. Simply run your map in this and it'll produce a file called BFront.log it'll just appear as a text file though with no extension. (If your on Windows 7 it'll drop into Compatibility Files just go into them to retrieve it.)
Now you'll see a bunch of errors in the document. Most likely saying CP* is not localized for the stats page. Bla, bla, bla. Now anyones complaining about missing localizations/movies you can ignore. Now I'm going to have to let you figure out how to solve them since I don;t know every single error off the top of my head 9 do know how to solve most of them though.) So if your Unsure of what an error is and how to solve it. Post here with your BFront.log and I'll help you solve and add it to a list of errors and how to fix them.
Dealing dealing with missing ODF files - Sometimes you'll get an error saying that it can't find an ODF file for an object. This is simply fixed open NotePad++ and copy this into it.
Code Select
[GameObjectClass]

ClassLabel		=	"prop"
GeometryName	=	""


[Properties]
And save the file in your Worlds ODF directory as the name of the missing ODF.
As I think of more errors that sometimes pop up when converting a map. I'll post more explanations here on how to solve them.
[/spoiler]
Step 4. Fixing the collision.
[spoiler]Okay this bit is probably going to scare you a lot. But don't get discouraged now, if you successfully debugged the world and it is now running you are going good. This part is going to take you several Days to do (Depending on how much time you devote to it. When I was converting Tantive Iv I used invisible collision blocks I worked on it several hours each day for about a weak.) So don't get discouraged on some maps most of the Collision is OK and you have very little work for you to do yourself. But on others like Tantive 50% of the map is glitch filled and buggy. Don't fear unlike debugging I can give you loads of help and advice on this subject.
Okay first off let's say we're trying to convert the Jedi Temple right? So the collision blocks Pandemic has given us are way to big in most cases for the job. Don't panic! We're just going to make our own invisible collision. First step find a model in the stock assets that is right for the job. We need something that is thin for the walls and we need something that is tall and thin for the library pillars. (The stock invisible collision blocks do okay for the floor. In most cases.) Okay so I'm going to show you how to get that thin model for the walls. First off as I said find the model we want, nab2_prop_wall.msh happens to fulfilled this requirement nicely. Hm but we have a problem don't we.
Oh dear, what is this madness SleepKiller is talking! The model will show up and ruin the look of the map! Okay, okay hang in there for starters. Go into your BFBuilder directory from there go to Assets/Shipped Worlds/Naboo/MSH. Open a new Window and leave that last one up. So in the new Window go into your Projects base directory. (You should know by now but it is the one with Zero Editor in.) From there go Worlds/***/MSH. Go back into the old Window and find these two files
nab2_bldg_brick04.tga
nab2_bldg_brick04.tga.option
Select them and press Ctrl + C. Go into the other Window and press Ctrl + V. Now back into the other Window and find these to files
nab2_prop_wall.msh
nab2_prop_wall.msh.option
Once again press Ctrl + C on them and go into the other Window and press Ctrl + V again. Now select the four files we just copied over and press Ctrl + C on them. Go into the other Window and with it navigate to My Documents. Once there make a new folder called Collision Fixing, enter the newly made folder and press Ctrl + V. Okay on these four files we have in this window I want you to rename the nab in all of them to col. so they now look like
col2_prop_wall.msh
col2_prop_wall.msh.option
col2_bldg_brick04.tga
col2_bldg_brick04.tga.option
Excellent now open Paint.Net and go back into the window containing the files we just renamed. Drag col2_bldg_brick04.tga into the Paint.Net window it will ask you what you want to do with it open it. Now here is another follow my mouse picture series.
Now that we've done that exit Paint.Net leave the Window with
col2_prop_wall.msh
col2_prop_wall.msh.option
col2_bldg_brick04.tga
col2_bldg_brick04.tga.option
in up. Then open up XVi32 and drag col2_prop_wall.msh onto its window. Press Ctrl + F. In the Text String box type .tga. Now if you go up one line from where it sent you, you'll see 00 00 48 42 41 54 52 42 04 00 00 00 00
change this to 00 00 48 42 41 54 52 42 04 00 00 00 04. Now go to the very end of this line, click in the text view box now instead of the HEX View (The one that contains letters that make sense to you.) The last two letters you'll see on the line are na change these to co. Go down to the next line the first letter is b change this to l. Save the file now and exit Xvi32.
Now select the four files
col2_prop_wall.msh
col2_prop_wall.msh.option
col2_bldg_brick04.tga
col2_bldg_brick04.tga.option
And press Ctrl+X Find your way back to your projects World/***/MSH folder and press Ctrl + V. Cool, now go back up into ***. From there into ODF open any ODF with NotePad++ copy and paste this code into the ODF
Code Select
[GameObjectClass]

ClassLabel		=	"prop"
GeometryName	=	"nab2_prop_wall.msh"


[Properties]

GeometryName	=	"col2_prop_wall"
FoleyFXGroup	=	"metal_foley"
Now save the ODF as com_inv_wall.odf (Go save it in Data***/Worlds/***/ODF/).
Okay I really can;t help you much with what comes next it is simple yet long work. Here is a basic outline of how to do it. We've made our special invisible collision for the World so we can place them in tight spots. See Appendix A for a list of invisible collision objects and where to find them.
I now presume you know roughly how to place objects in Zero Editor. If not go to your BFBuilder directory form there go into Documentation. And double click on Zeroedit read the web page that pops up through and through. (Sorry about not explaining this part more it is just a whole other thing completely.)
Now here is some tips to help make your Invisible Collision placing much more easy.
Now the process becomes test in-game. Find the spots with no collision, patch them up in the editor. Repeat it until your map is complete Be careful of placing too many objects though I'll be writing an Appendix on how to deal with this if you do. Until Step 5. !
[/spoiler]
Step 5. Fixing The Lighting. Not finished only just started, don't try reading it.
[spoiler]Now SWBF1 and SWBF2 have completely different lighting systems. This does not mean we can not convert the system into SWBF1's system. First off go into your World1 folder(You should be familiarized with it by now.) find ***.lgt and open it with NotePad++. Then find ***.sky also open this with NotePad++. Close anything else you have in NotePad++ up. Leave NotePad++ up. Now open your Start Menu and go, All Programs/LucasArts/Star Wars Battlefront II/Mod tools/ and open Star Wars Battlefront II Mod Tools. It'll ask you to fill out some information regarding what you want to make your New World be just fill out the basic information. Conquest Gamemode some random stuff for the description and name. Create it.[/spoiler]
Appendix A
[spoiler]com_inv_col_8 - Data***/Common/ODF/
com_inv_col_16 - Data***/Common/ODF/
com_inv_col_32 - Data***/Common/ODF/
com_inv_col_64 - Data***/Common/ODF/
com_inv_wall - Data***/Worlds/***/ODF/
[/spoiler]
Stand by for Step 5.
What do you think of it so far? Is it understandable? Is it instructive? Please tell me.Also if you find the Tutorial is not working for you let me know, the odds are I left out some curial piece of information. If I have I'll fix it A.S.A.P[/spoiler]
#118
SWBF1 Modding / SWBF Unleashed[WIP]
January 27, 2012, 06:43:03 PM
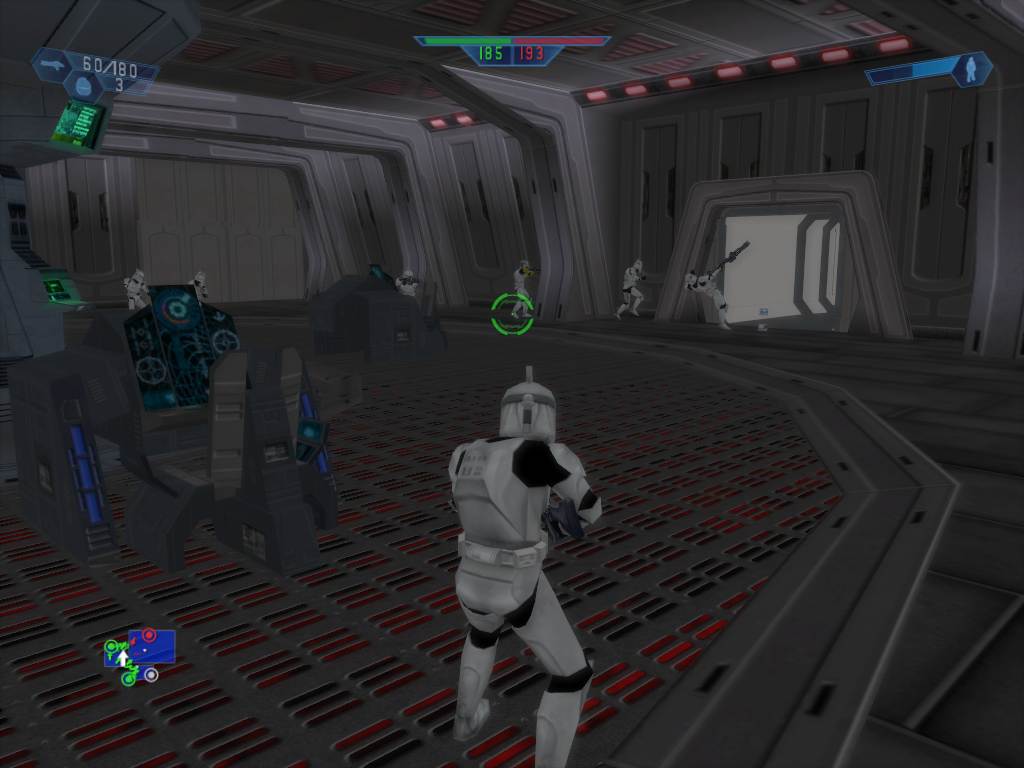
Okay first off I seem to be attached to my BFBuilder folder, no sooner had I stopped modding I had started a little personal project of mine. So I'm returning to modding SWBF since I've done a lot on this little mod and I feel it is good enough for a public release.
The mods name is Star Wars Battlefront Unleashed. Simply put this is a mod I enjoy making and enjoy playing. I don't care if no one else likes it or not. (Although I'm hoping they do .)
.)
Mod State.
CW Era 100% - Ready
GCW Era 100% - Ready
Hunt Mode 50% - Done, but news map for the next release are being made.
Survival Mode 30% - Current Priority
MP Hunt Modes 0% - Low Priority
SWBFII Conversions 10% - A couple have been implemented.
Super Secret Part B. 0% - Medium priority
Republic Classes
Clone Trooper
An all round unit equipped with weapons to both take on infantry and vehicles alike.
Primary Weapons
Blaster Rifle - A weapon that maintains its accuracy while standing still and has little spread while running.
Blaster Pistol - A weapon designed for when the trooper runs out of ammo in his primary gun.
Secondary Weapons
Ion Pulse Attachment - An attachment for the troopers Blaster Rifle, designed to destroy droids in a single shot.
Concussion Pulse Attachment - An attachment for the Blaster Rifle to shoot a heavy concussion bolt that damages vehicles.
Assault Trooper
Heavy troopers with equipment designed to take on vehicles with ease and to blow up Droidekas.
Primary Weapons
Missile Launcher - A heavy duty weapon that heavily damages vehicles.
Blaster Pistol - A secondary weapon for when infantry get to close for comfort.
Secondary Weapons
Reverse Polarity Pulse Grenade - A grenade that disables vehicles and heavily damages Droidekas shields.
Mines - A support item that blows up if anything gets to close.
Clone Pilot
Skilled Pilots that support their fellow troopers on the battlefield and also take out infantry with ease.
Primary Weapons
EMP Launcher - A Anti-Infantry weapon that launches EMP Grenades across the battlefield.
Blaster Pistol - A weapon that is not very powerful but if the trooper has run out of ammo is invaluable.
Secondary Weapons
Fusion Cutter - A support tool that can repair vehicles and build support items.
Supply Dispenser - A support item that can give allies ammo and health.
Clone Sharpshooter
Skilled snipers that can drop enemy infantry from across the map.
Primary Weapons
Sniper Rifle - A powerful rifle that can drop up infantry with no warning what so ever.
Blaster Pistol - A weapon used when the enemy gets to close for comfort.
Secondary Weapons
EMP Grenade - A grenade that frys the internal systems of droids.
Remote Droid - A droid that is controled by the sniper to call down orbital bombardments.
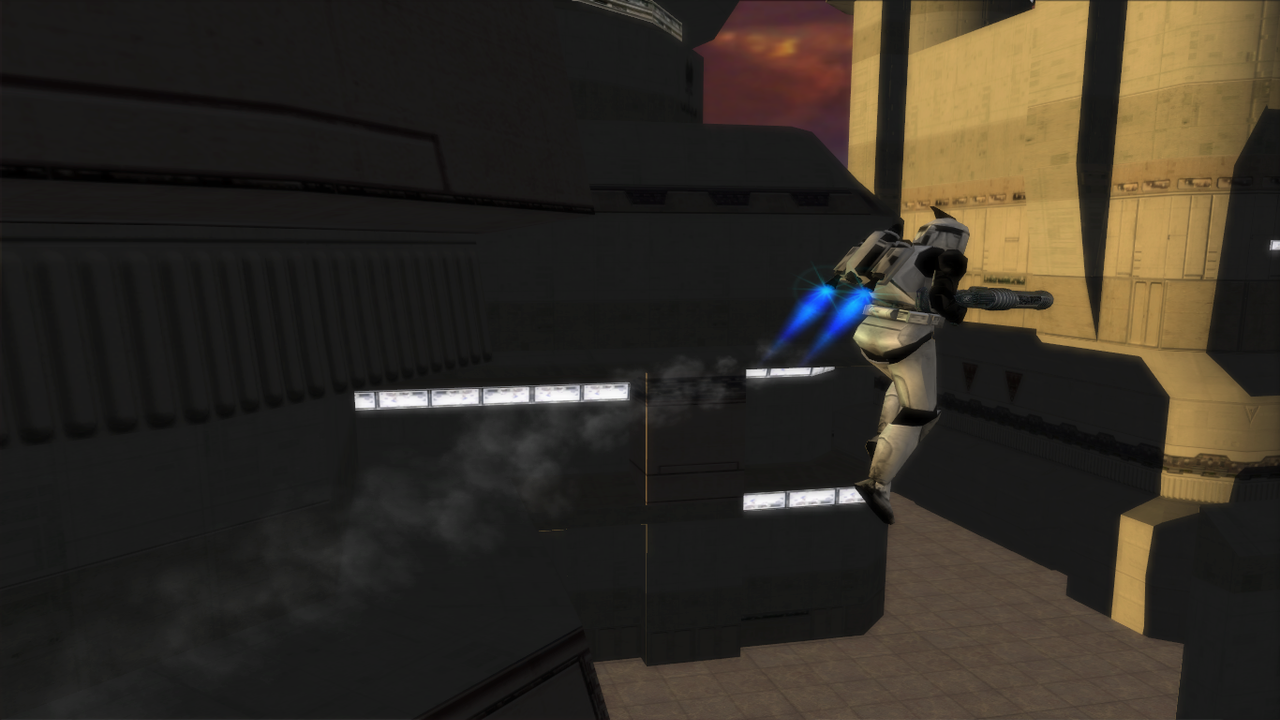
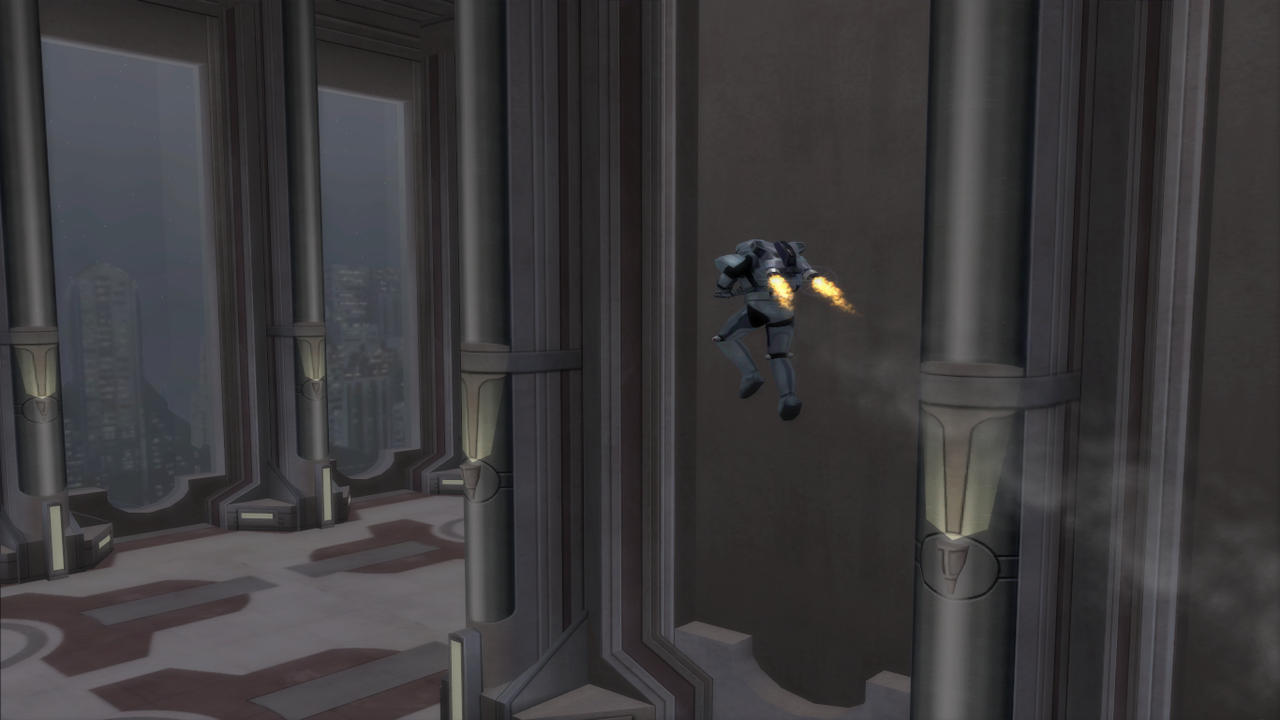
Jet Trooper
Skilled elite troopers armed with the best weapons available.
Primary Weapons
Blaster Carbine - A weapon with three modes of fire.
Normal Fire - Fire a lot laser bolts off in quick succession until the clip is depleted.
Burst Fire - Fire a burst of three laser bolts and with it being a fully automatic weapon it is deadly in the hands of an expert.
Charged Shot - Fire a powerful charged shot that servilely damages infantry, if it hits the head it kills instantly.
Secondary Weapons
Thermal Detonator - A powerful grenade that wipes out all infantry in a large blast radius.
*PANT PANT PANT PANT* That was a lot to write.
CIS Classes
Super Battle Droid
Powerful Droid units capable of taking on all foes.
Primary Weapons
Wrist Blaster - A powerful automatic weapon that can engage enemy's at distance and up close.
Low Energy Wrist Blaster - A weapon that shots low energy laser bolts designed for use if energy banks are running low.
Secondary Weapons
Wrist Rocket - A simple cheap rocket that is designed for use against infantry.
AV Wrist Rocket - A powerful rokcet that deals heavy damage to vehicles.[size]
Assault Droid
Heavy droid units designed to take out vehicles with ease.
Primary Weapons
Missile Launcher - A powerful weapon that shoots rockets capable of inflicting massive damage.
Blaster Pistol - A backup weapon in case enemy infantry get to close.
Secondary Weapons
Concussion Grenades - Powerful shock grenades that heavily damage vehicles.
Mines - A support weapon that blows up if anything gets to close to get.
Pilot Droid
Support units that can help out its friends while giving out fire to the enemy.
Primary Weapons
Radiation Launcher - A powerful Anti-Infantry weapon that launches radiation grenades into enemy lines.
Blaster Pistol - A simple weapon given to pilots as a back up weapon.
Secondary Weapons
Fusion Cutter - A support tool used to repair vehicles and support items.
Supply Dispenser - A utility to dispense supplies to friends.
Assassin Droid
A droid programmed with advanced combat mechanics.
Primary Weapons
Sniper Rifle - A powerful rifle that can kill anything with a single hit to the head.
Blaster Pistol - A simple close combat backup weapon.
Secondary Weapons
Fragmentation Grenade - A grenade that damages infantry with shrapnel.
Remote Droid - A droid used for scouting ahead and call orbiting strikes down.
Droideka
Powerful Anti-Infantry units they deserved to be feared.
Primary Weapons
Repeating Blasters - Powerful blasters that can kill infantry very quickly.
Secondary Weapons
Shield Generator - Projects a powerful shield around the Droideka.
Rebel Classes
Rebel Trooper
The back bone of the Rebel Army equipped to take on any foe.
Primary Weapons
Blaster Rifle - Powerful Anti-Infantry blaster rifle, it shots much faster than in the CW era and can take out troops with ease.
Blaster Pistol - Mainly considered unessential on the trooper, they keep it in case there ammo gets depleted.
Secondary Weapons
Fragmentation Grenade - Cheap and simple grenades, damages foes with shrapnel caused by the blast.
Concussion Grenade - Powerful shock grenades that damage vehicles more than the troopers standard grenade.
Rebel Vanguard
The heavy troopers of the Rebel forces, capable of taking out tanks with ease.
Primary Weapons
Missile Launcher - Launches two tracking missiles at a time at vehicles that heavily damage them.
Blaster Pistol - Simple weapon given to the Vanguard to take on infantry.
Secondary Weapons
EMP Grenade - A powerful grenade that deals heavy damage to vehicles.
Mines - Simple support tool, that can be used against vehicles and infantry alike.
Rebel Pilot
Support infantry that can give ammo and fix vehicles/buildings.
Primary Weapons
Shotgun - A close quarters weapon that can fire off rounds of 5 bolts in quick succession.
Blaster Pistol - A weapon given to Pilots so they can engage foes at greater range.
Secondary Weapons
Fusion Cutter - A support tool, can be used to fix vehicles or build buildings.
Supply Dispenser - A support utility gives out Ammo and Bacta tanks.
Rebel Marksman
Support units, designed to take out infantry from a far.
Primary Weapons
Sniper Rifle - A Rifle that deals heavy damage to infantry a shot in the head results in a kill instantly on any human.
Blaster Pistol - Given to the sniper to defend herself should the enemy get in close quarters.
Secondary Weapons
Thermal Detonator - Heavy grenades killing all humans in a massive blast radius.
Recon Droid - A small droid used for scouting ahead or signalling bombardments.
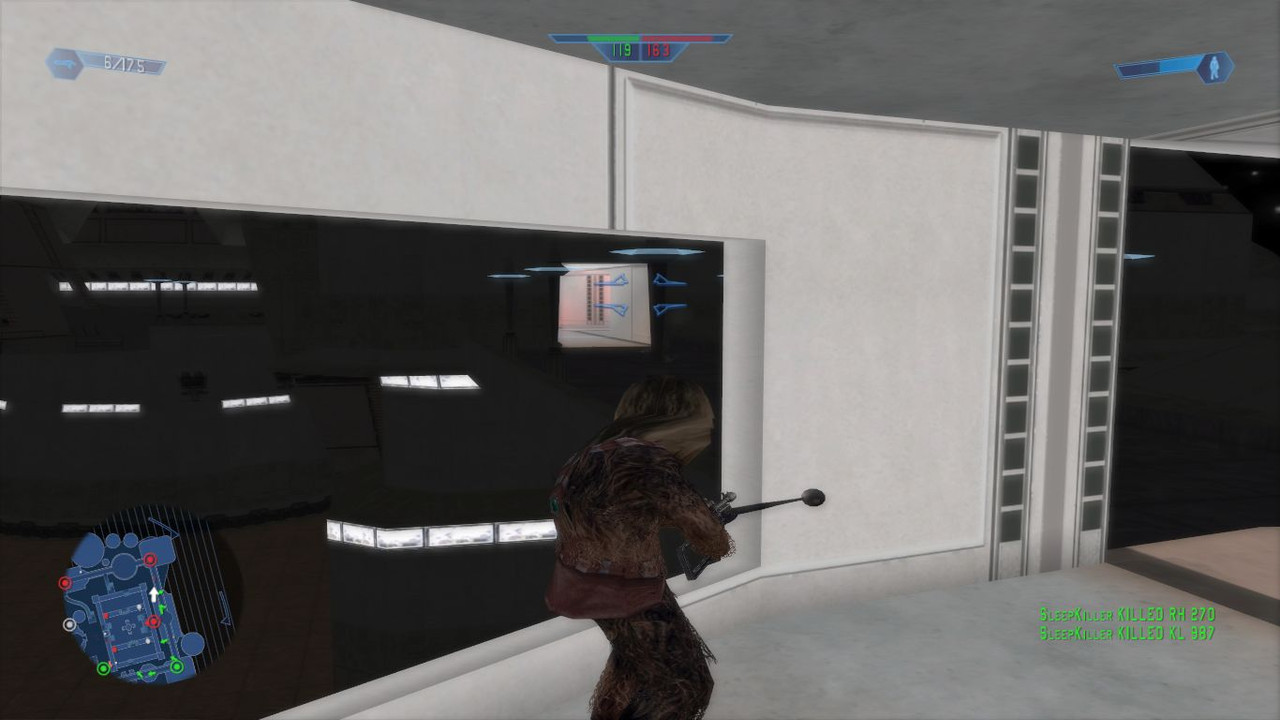
Wookie Smuggler
Powerful warriors capable of taking out infantry very easily.
Primary Weapons
Bowcaster - Powerful weapon that can be uncharged to fire off rapid bolts, or charged to shot multiple bolts at once.
Commando Pistol - Very powerful pistol that shoots off three laser blasts in quick succession, takes a few seconds to recharge.
Imperial Classes
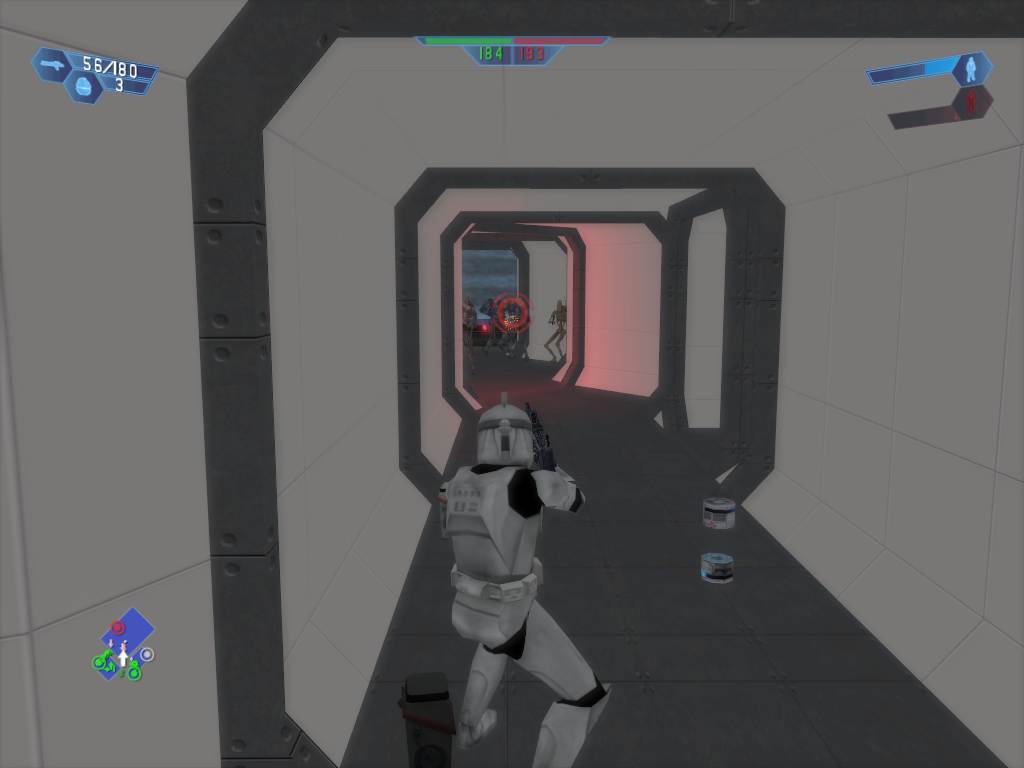
Storm Trooper
The most common trooper in the Imperial army, capable of destroying light and heavy units alike.
Primary Weapons
Blaster Rifle - A simple blaster that takes out infantry easily.
Blaster Pistol - A low power blaster to take on infantry when primary Ammo is depleted.
Secondary Weapons
Fire Grenade - A simple grenade that spews out fire killing enemy infantry.
Concussion Grenade - A grenade designed for taking out vehicles.
Shock Trooper
Heavy units for taking out any foe.
Primary Weapons
Missile Launcher - Launches a single powerful missile to take out vehicles or infantry.
Blaster Pistol - A backup weapon for use when the Missile Launcher isn't loaded.
Secondary Weapons
Poison Grenade - A grenade that spews out Poison over a large area, if attached to a vehicle before it goes off it temporarily makes the vehicle useless for a few minutes while the Poison sub-sides.
Mines - Powerful explosives, causes massive damage to vehicles.
Imperial Pilot
Support units equipped to aid others on the battlefield.
Primary Weapons
Shrapnel Cannon - A more deadly version of a shotgun, shots hot pieces of metal at foes.
Blaster Pistol - A simple weapon for use when the enemy is at range.
Secondary Weapons
Fusion Cutter - Support tool, used by pilots for repairing vehicles and other items on the battlefront.
Supply Dispenser - Utility for giving out bacta tanks and ammo.
Imperial Sniper
Anti-Infantry support units.
Primary Weapons
Sniper Rifle - A long range rifle, deadly to any human.
Blaster Pistol - A simple blaster for taking on infantry up close.
Secondary Weapons
Thermal Detonators - Powerful grenades only vehicles can survive the explosion that comes from this.
Remote Droid - Used by imperials for scouting ahead and for pin pointing locations from a Star Destroyer.
Dark Trooper - Phase II
Heavy units, tough to take out. Has a Jetpack with a good stock of fuel.
Primary Weapon
Blaster Cannon - A heavy duty gun, kills most infantry in two hits. Deals damage to vehicles as well.
GCW Screenshots
[spoiler]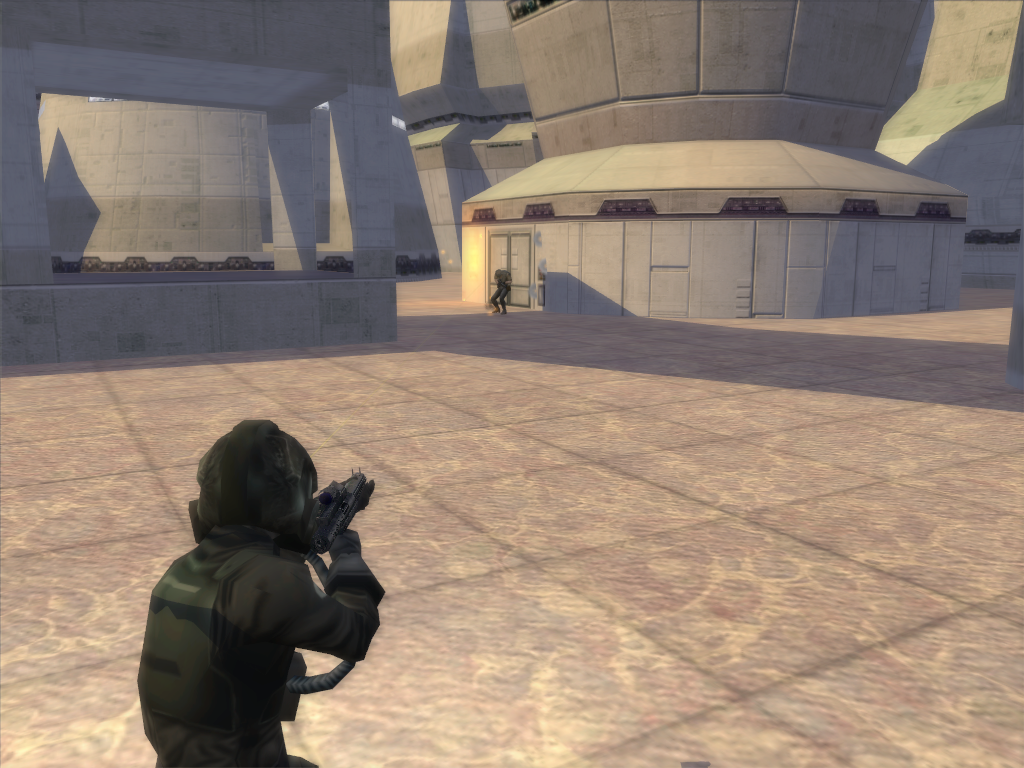
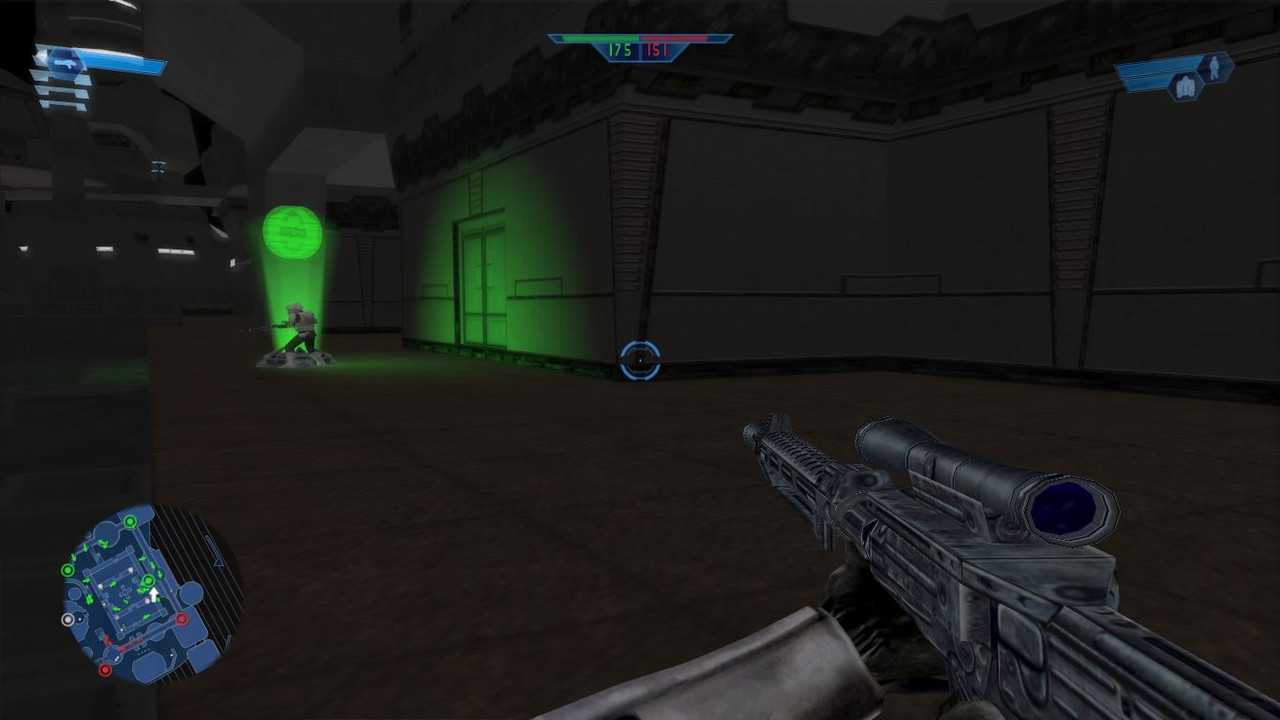
Shrapnel Cannon at work.
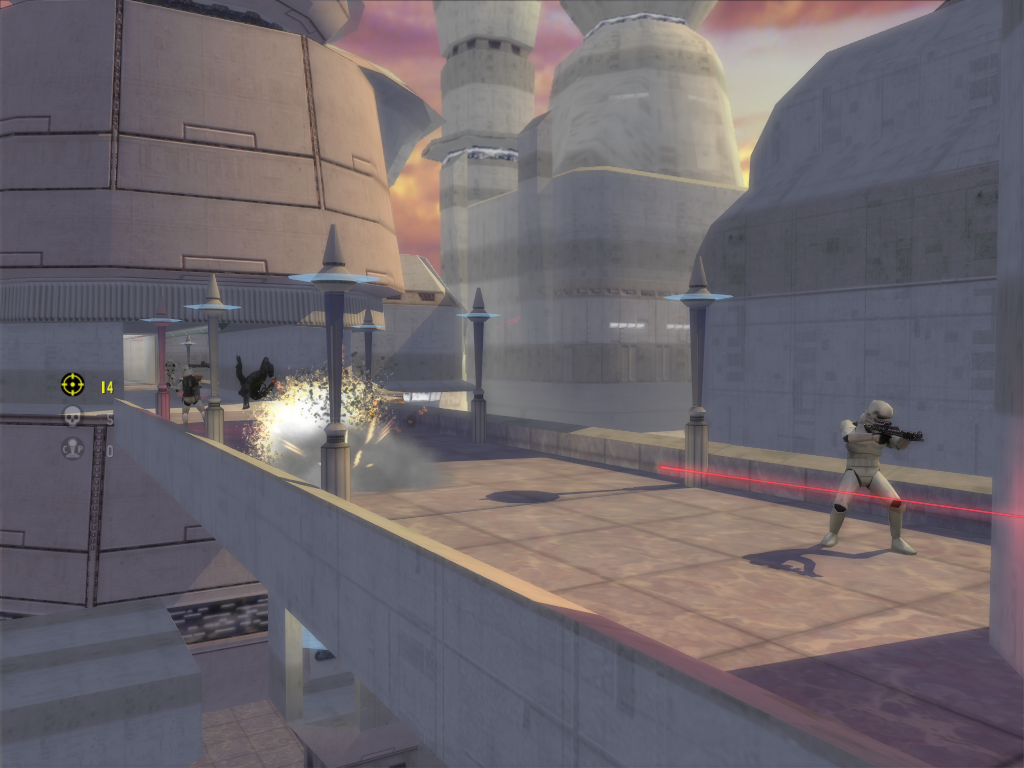
Fragmentation Grenade at work.
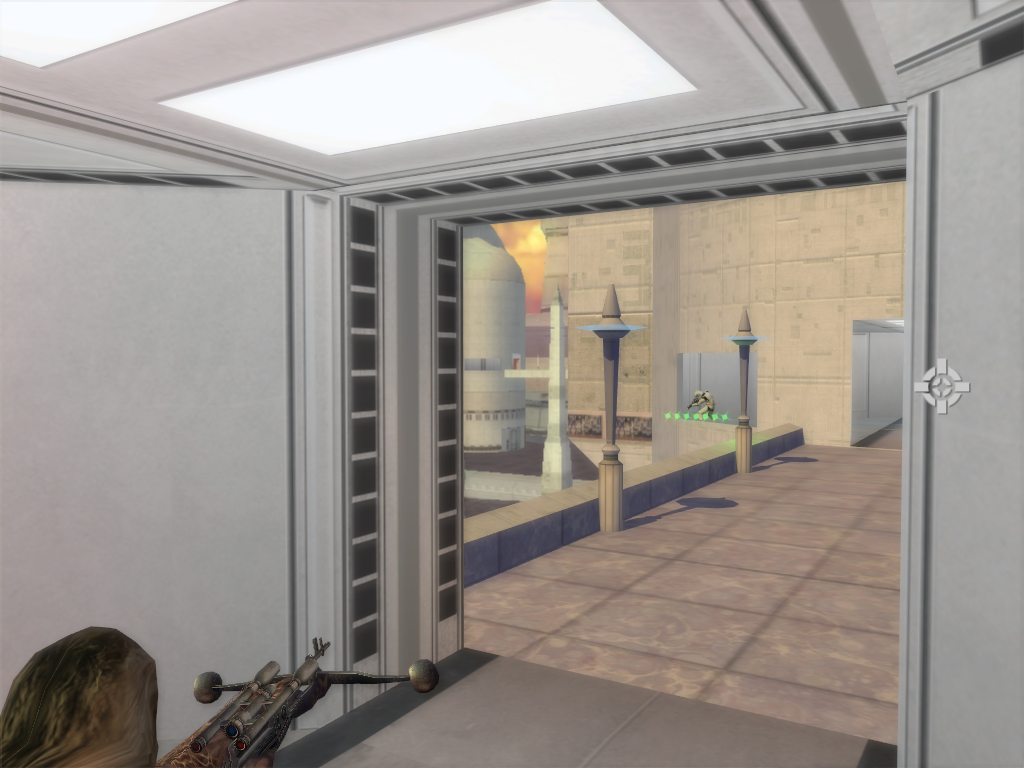
Bowcaster firing at a Stormtrooper.
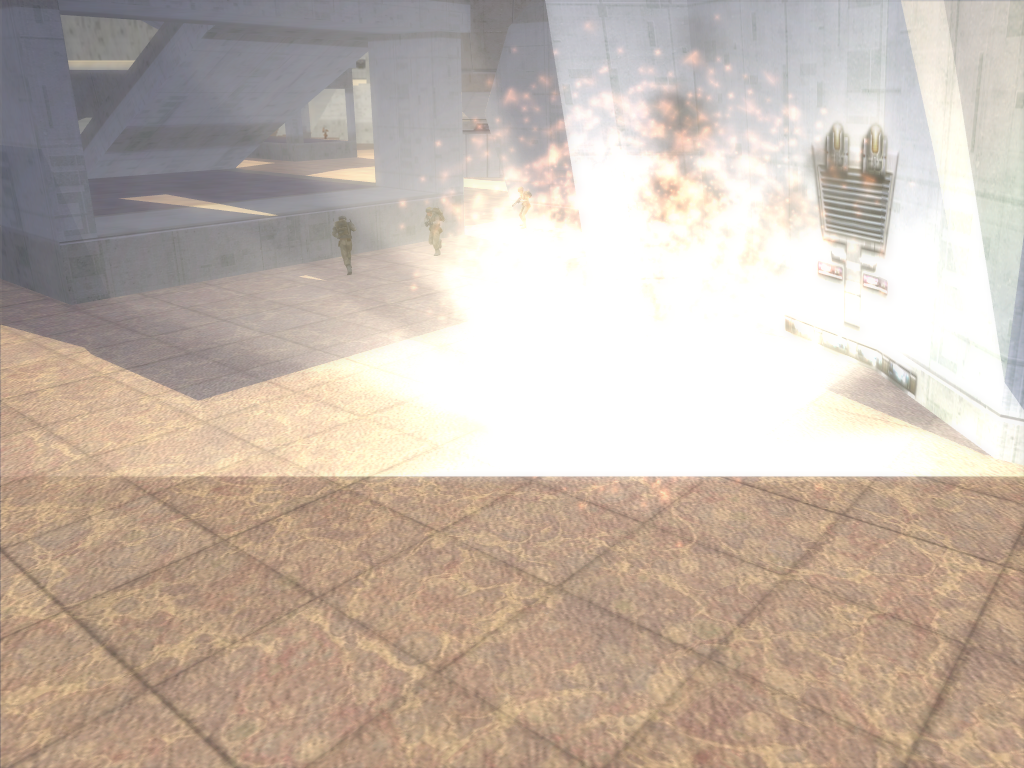
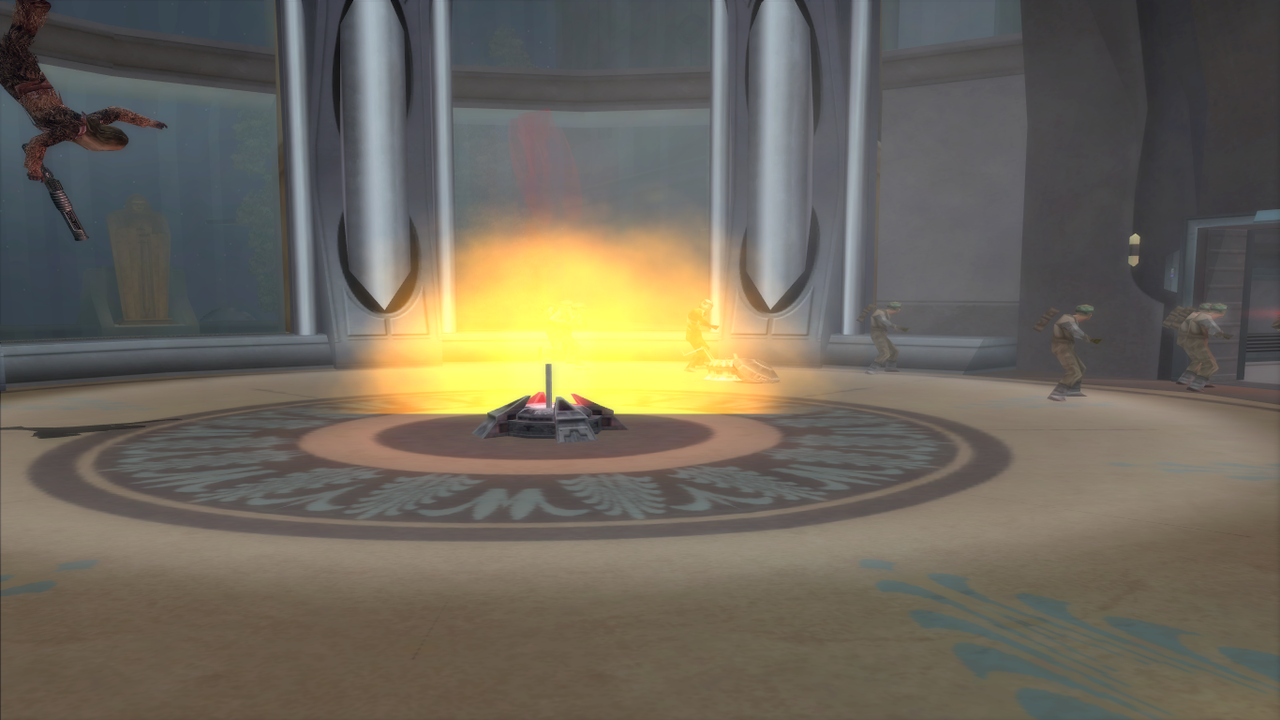
Thermal Detonator exploding.

Dark Trooper Phase II attacking a Rebel command post.
Almost captured it to.
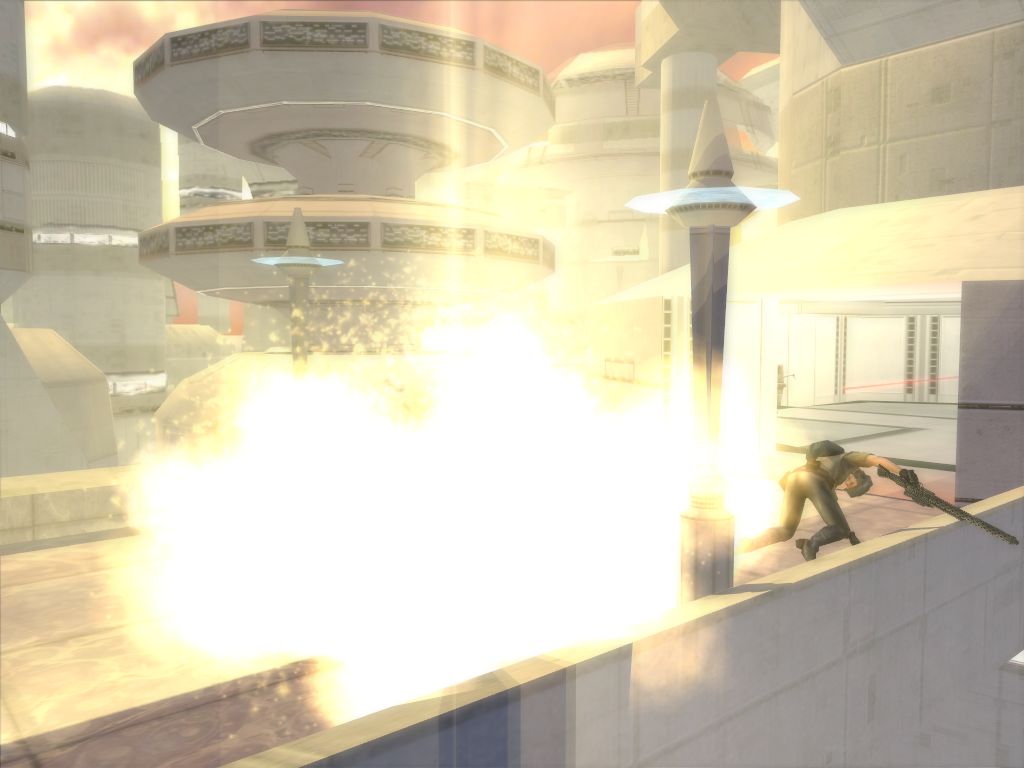
Flame Grenade exploding onto a Rebel sniper.
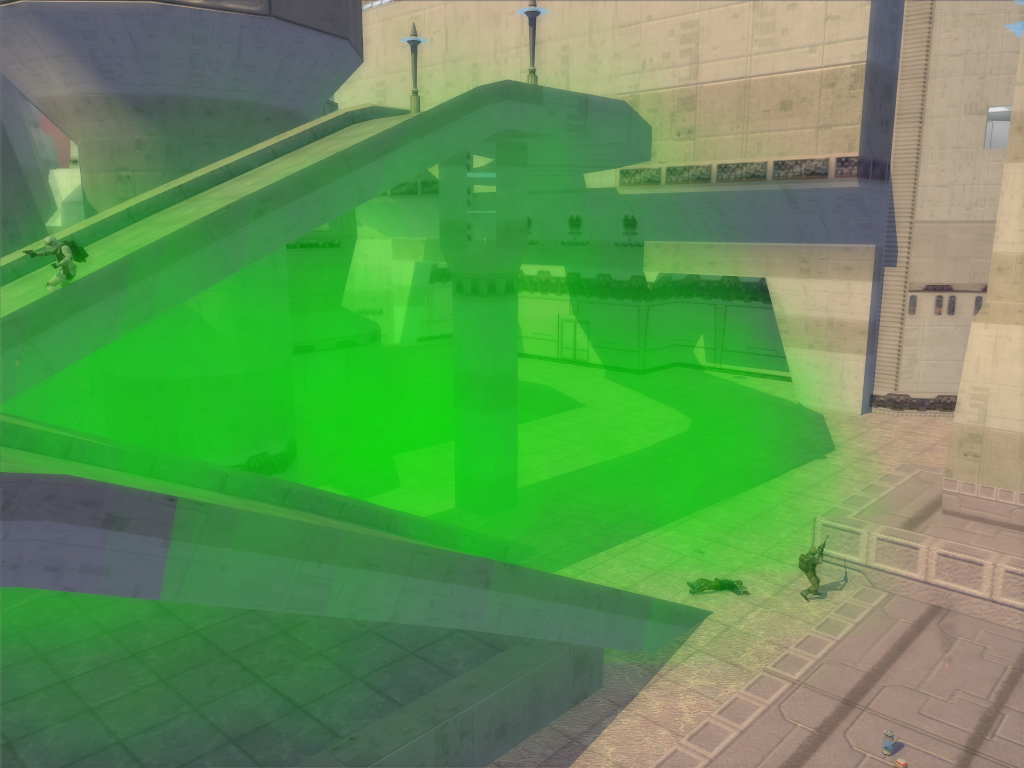
Two Poison Grenades exploding onto some unfortunate Rebel troops.[/spoiler]
CW Screenshots
[spoiler]

 [/spoiler]
The mods name is Star Wars Battlefront Unleashed. Simply put this is a mod I enjoy making and enjoy playing. I don't care if no one else likes it or not. (Although I'm hoping they do
.)Mod State.
CW Era 100% - Ready
GCW Era 100% - Ready
Hunt Mode 50% - Done, but news map for the next release are being made.
Survival Mode 30% - Current Priority
MP Hunt Modes 0% - Low Priority
SWBFII Conversions 10% - A couple have been implemented.
Super Secret Part B. 0% - Medium priority
Republic Classes
Clone Trooper
An all round unit equipped with weapons to both take on infantry and vehicles alike.
Primary Weapons
Blaster Rifle - A weapon that maintains its accuracy while standing still and has little spread while running.
Blaster Pistol - A weapon designed for when the trooper runs out of ammo in his primary gun.
Secondary Weapons
Ion Pulse Attachment - An attachment for the troopers Blaster Rifle, designed to destroy droids in a single shot.
Concussion Pulse Attachment - An attachment for the Blaster Rifle to shoot a heavy concussion bolt that damages vehicles.
Assault Trooper
Heavy troopers with equipment designed to take on vehicles with ease and to blow up Droidekas.
Primary Weapons
Missile Launcher - A heavy duty weapon that heavily damages vehicles.
Blaster Pistol - A secondary weapon for when infantry get to close for comfort.
Secondary Weapons
Reverse Polarity Pulse Grenade - A grenade that disables vehicles and heavily damages Droidekas shields.
Mines - A support item that blows up if anything gets to close.
Clone Pilot
Skilled Pilots that support their fellow troopers on the battlefield and also take out infantry with ease.
Primary Weapons
EMP Launcher - A Anti-Infantry weapon that launches EMP Grenades across the battlefield.
Blaster Pistol - A weapon that is not very powerful but if the trooper has run out of ammo is invaluable.
Secondary Weapons
Fusion Cutter - A support tool that can repair vehicles and build support items.
Supply Dispenser - A support item that can give allies ammo and health.
Clone Sharpshooter
Skilled snipers that can drop enemy infantry from across the map.
Primary Weapons
Sniper Rifle - A powerful rifle that can drop up infantry with no warning what so ever.
Blaster Pistol - A weapon used when the enemy gets to close for comfort.
Secondary Weapons
EMP Grenade - A grenade that frys the internal systems of droids.
Remote Droid - A droid that is controled by the sniper to call down orbital bombardments.
Jet Trooper
Skilled elite troopers armed with the best weapons available.
Primary Weapons
Blaster Carbine - A weapon with three modes of fire.
Normal Fire - Fire a lot laser bolts off in quick succession until the clip is depleted.
Burst Fire - Fire a burst of three laser bolts and with it being a fully automatic weapon it is deadly in the hands of an expert.
Charged Shot - Fire a powerful charged shot that servilely damages infantry, if it hits the head it kills instantly.
Secondary Weapons
Thermal Detonator - A powerful grenade that wipes out all infantry in a large blast radius.
*PANT PANT PANT PANT* That was a lot to write.
CIS Classes
Super Battle Droid
Powerful Droid units capable of taking on all foes.
Primary Weapons
Wrist Blaster - A powerful automatic weapon that can engage enemy's at distance and up close.
Low Energy Wrist Blaster - A weapon that shots low energy laser bolts designed for use if energy banks are running low.
Secondary Weapons
Wrist Rocket - A simple cheap rocket that is designed for use against infantry.
AV Wrist Rocket - A powerful rokcet that deals heavy damage to vehicles.[size]
Assault Droid
Heavy droid units designed to take out vehicles with ease.
Primary Weapons
Missile Launcher - A powerful weapon that shoots rockets capable of inflicting massive damage.
Blaster Pistol - A backup weapon in case enemy infantry get to close.
Secondary Weapons
Concussion Grenades - Powerful shock grenades that heavily damage vehicles.
Mines - A support weapon that blows up if anything gets to close to get.
Pilot Droid
Support units that can help out its friends while giving out fire to the enemy.
Primary Weapons
Radiation Launcher - A powerful Anti-Infantry weapon that launches radiation grenades into enemy lines.
Blaster Pistol - A simple weapon given to pilots as a back up weapon.
Secondary Weapons
Fusion Cutter - A support tool used to repair vehicles and support items.
Supply Dispenser - A utility to dispense supplies to friends.
Assassin Droid
A droid programmed with advanced combat mechanics.
Primary Weapons
Sniper Rifle - A powerful rifle that can kill anything with a single hit to the head.
Blaster Pistol - A simple close combat backup weapon.
Secondary Weapons
Fragmentation Grenade - A grenade that damages infantry with shrapnel.
Remote Droid - A droid used for scouting ahead and call orbiting strikes down.
Droideka
Powerful Anti-Infantry units they deserved to be feared.
Primary Weapons
Repeating Blasters - Powerful blasters that can kill infantry very quickly.
Secondary Weapons
Shield Generator - Projects a powerful shield around the Droideka.
Rebel Classes
Rebel Trooper
The back bone of the Rebel Army equipped to take on any foe.
Primary Weapons
Blaster Rifle - Powerful Anti-Infantry blaster rifle, it shots much faster than in the CW era and can take out troops with ease.
Blaster Pistol - Mainly considered unessential on the trooper, they keep it in case there ammo gets depleted.
Secondary Weapons
Fragmentation Grenade - Cheap and simple grenades, damages foes with shrapnel caused by the blast.
Concussion Grenade - Powerful shock grenades that damage vehicles more than the troopers standard grenade.
Rebel Vanguard
The heavy troopers of the Rebel forces, capable of taking out tanks with ease.
Primary Weapons
Missile Launcher - Launches two tracking missiles at a time at vehicles that heavily damage them.
Blaster Pistol - Simple weapon given to the Vanguard to take on infantry.
Secondary Weapons
EMP Grenade - A powerful grenade that deals heavy damage to vehicles.
Mines - Simple support tool, that can be used against vehicles and infantry alike.
Rebel Pilot
Support infantry that can give ammo and fix vehicles/buildings.
Primary Weapons
Shotgun - A close quarters weapon that can fire off rounds of 5 bolts in quick succession.
Blaster Pistol - A weapon given to Pilots so they can engage foes at greater range.
Secondary Weapons
Fusion Cutter - A support tool, can be used to fix vehicles or build buildings.
Supply Dispenser - A support utility gives out Ammo and Bacta tanks.
Rebel Marksman
Support units, designed to take out infantry from a far.
Primary Weapons
Sniper Rifle - A Rifle that deals heavy damage to infantry a shot in the head results in a kill instantly on any human.
Blaster Pistol - Given to the sniper to defend herself should the enemy get in close quarters.
Secondary Weapons
Thermal Detonator - Heavy grenades killing all humans in a massive blast radius.
Recon Droid - A small droid used for scouting ahead or signalling bombardments.
Wookie Smuggler
Powerful warriors capable of taking out infantry very easily.
Primary Weapons
Bowcaster - Powerful weapon that can be uncharged to fire off rapid bolts, or charged to shot multiple bolts at once.
Commando Pistol - Very powerful pistol that shoots off three laser blasts in quick succession, takes a few seconds to recharge.
Imperial Classes
Storm Trooper
The most common trooper in the Imperial army, capable of destroying light and heavy units alike.
Primary Weapons
Blaster Rifle - A simple blaster that takes out infantry easily.
Blaster Pistol - A low power blaster to take on infantry when primary Ammo is depleted.
Secondary Weapons
Fire Grenade - A simple grenade that spews out fire killing enemy infantry.
Concussion Grenade - A grenade designed for taking out vehicles.
Shock Trooper
Heavy units for taking out any foe.
Primary Weapons
Missile Launcher - Launches a single powerful missile to take out vehicles or infantry.
Blaster Pistol - A backup weapon for use when the Missile Launcher isn't loaded.
Secondary Weapons
Poison Grenade - A grenade that spews out Poison over a large area, if attached to a vehicle before it goes off it temporarily makes the vehicle useless for a few minutes while the Poison sub-sides.
Mines - Powerful explosives, causes massive damage to vehicles.
Imperial Pilot
Support units equipped to aid others on the battlefield.
Primary Weapons
Shrapnel Cannon - A more deadly version of a shotgun, shots hot pieces of metal at foes.
Blaster Pistol - A simple weapon for use when the enemy is at range.
Secondary Weapons
Fusion Cutter - Support tool, used by pilots for repairing vehicles and other items on the battlefront.
Supply Dispenser - Utility for giving out bacta tanks and ammo.
Imperial Sniper
Anti-Infantry support units.
Primary Weapons
Sniper Rifle - A long range rifle, deadly to any human.
Blaster Pistol - A simple blaster for taking on infantry up close.
Secondary Weapons
Thermal Detonators - Powerful grenades only vehicles can survive the explosion that comes from this.
Remote Droid - Used by imperials for scouting ahead and for pin pointing locations from a Star Destroyer.
Dark Trooper - Phase II
Heavy units, tough to take out. Has a Jetpack with a good stock of fuel.
Primary Weapon
Blaster Cannon - A heavy duty gun, kills most infantry in two hits. Deals damage to vehicles as well.
GCW Screenshots
[spoiler]
Shrapnel Cannon at work.
Fragmentation Grenade at work.
Bowcaster firing at a Stormtrooper.
Thermal Detonator exploding.
Dark Trooper Phase II attacking a Rebel command post.
Almost captured it to.
Flame Grenade exploding onto a Rebel sniper.
Two Poison Grenades exploding onto some unfortunate Rebel troops.[/spoiler]
CW Screenshots
[spoiler]
[/spoiler] #119
SWBF1 Modding Tutorials / Guide to activating the decal system in SWBF1.
January 26, 2012, 03:47:14 PM
I'm so thrilled at the moment. I just discovered how to get this ODF line to do some thing.
It is surprisingly simple, first go into assets then to shipped worlds and go into Naboo. After that go into the effects folder from this folder we need the following files.
Now you can do this to any level or any side. You just need to put these files in that things effects folder and add this to its .req file.
Note, sadly they only show up on the terrain, but they bend and morph to fit the terrain. So it looks better than the method of adding them to the explosion .FX file.
Enjoy!
Code Select
Decal = "decal_explosion"It is surprisingly simple, first go into assets then to shipped worlds and go into Naboo. After that go into the effects folder from this folder we need the following files.
Code Select
decal_explosion_crack_bump.tga
decal_explosion_crack_bump.tga.option
decal_explosion_scorch.tga
decal_explosion_scorch.tga.option
nab2_decals.fx
Now you can do this to any level or any side. You just need to put these files in that things effects folder and add this to its .req file.
Code Select
	REQN
	{
	"config"
	"nab2_decals"
	}
Note, sadly they only show up on the terrain, but they bend and morph to fit the terrain. So it looks better than the method of adding them to the explosion .FX file.
Enjoy!
#120
SWBF1 Modding / SWBFII Terrain Munger
January 21, 2012, 08:25:46 PM
This handy gizmo will let you munge unedited SWBFII terrain for SWBFI. So you can get it in SWBF1 easily and with no changes. Just read the readme for instructions. I used this when converting Dagobah.
I forgot to post this before I left, so I'm posting it now. Enjoy.
I forgot to post this before I left, so I'm posting it now. Enjoy.
